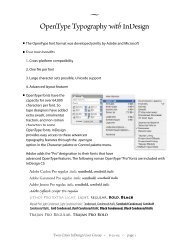
QuarkXPress to Adobe InDesign CS4 Conversion Guide
QuarkXPress to Adobe InDesign CS4 Conversion Guide
QuarkXPress to Adobe InDesign CS4 Conversion Guide

Create successful ePaper yourself
Turn your PDF publications into a flip-book with our unique Google optimized e-Paper software.
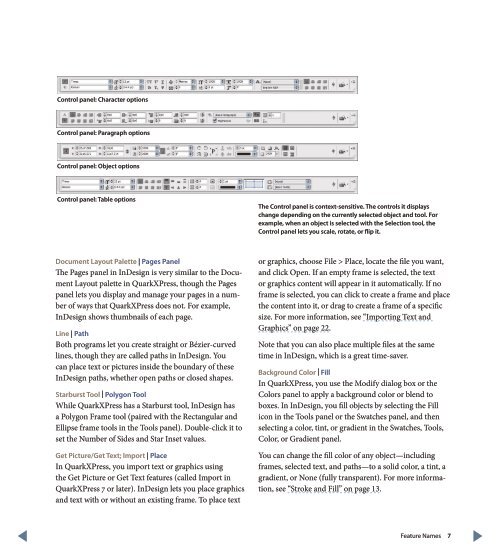
Control panel: Character options<br />
Control panel: Paragraph options<br />
Control panel: Object options<br />
Control panel: Table options<br />
The Control panel is context-sensitive. The controls it displays<br />
change depending on the currently selected object and <strong>to</strong>ol. For<br />
example, when an object is selected with the Selection <strong>to</strong>ol, the<br />
Control panel lets you scale, rotate, or flip it.<br />
Document Layout Palette | Pages Panel<br />
The Pages panel in <strong>InDesign</strong> is very similar <strong>to</strong> the Document<br />
Layout palette in <strong>QuarkXPress</strong>, though the Pages<br />
panel lets you display and manage your pages in a number<br />
of ways that <strong>QuarkXPress</strong> does not. For example,<br />
<strong>InDesign</strong> shows thumbnails of each page.<br />
Line | Path<br />
Both programs let you create straight or Bézier-curved<br />
lines, though they are called paths in <strong>InDesign</strong>. You<br />
can place text or pictures inside the boundary of these<br />
<strong>InDesign</strong> paths, whether open paths or closed shapes.<br />
Starburst Tool | Polygon Tool<br />
While <strong>QuarkXPress</strong> has a Starburst <strong>to</strong>ol, <strong>InDesign</strong> has<br />
a Polygon Frame <strong>to</strong>ol (paired with the Rectangular and<br />
Ellipse frame <strong>to</strong>ols in the Tools panel). Double-click it <strong>to</strong><br />
set the Number of Sides and Star Inset values.<br />
Get Picture/Get Text; Import | Place<br />
In <strong>QuarkXPress</strong>, you import text or graphics using<br />
the Get Picture or Get Text features (called Import in<br />
<strong>QuarkXPress</strong> 7 or later). <strong>InDesign</strong> lets you place graphics<br />
and text with or without an existing frame. To place text<br />
or graphics, choose File > Place, locate the file you want,<br />
and click Open. If an empty frame is selected, the text<br />
or graphics content will appear in it au<strong>to</strong>matically. If no<br />
frame is selected, you can click <strong>to</strong> create a frame and place<br />
the content in<strong>to</strong> it, or drag <strong>to</strong> create a frame of a specific<br />
size. For more information, see “Importing Text and<br />
Graphics” on page 22.<br />
Note that you can also place multiple files at the same<br />
time in <strong>InDesign</strong>, which is a great time-saver.<br />
Background Color | Fill<br />
In <strong>QuarkXPress</strong>, you use the Modify dialog box or the<br />
Colors panel <strong>to</strong> apply a background color or blend <strong>to</strong><br />
boxes. In <strong>InDesign</strong>, you fill objects by selecting the Fill<br />
icon in the Tools panel or the Swatches panel, and then<br />
selecting a color, tint, or gradient in the Swatches, Tools,<br />
Color, or Gradient panel.<br />
You can change the fill color of any object—including<br />
frames, selected text, and paths—<strong>to</strong> a solid color, a tint, a<br />
gradient, or None (fully transparent). For more information,<br />
see “Stroke and Fill” on page 13.<br />
Feature Names 7