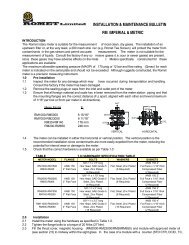
User's Manual AXF Magnetic Flowmeter Integral ... - Yokogawa
User's Manual AXF Magnetic Flowmeter Integral ... - Yokogawa
User's Manual AXF Magnetic Flowmeter Integral ... - Yokogawa

You also want an ePaper? Increase the reach of your titles
YUMPU automatically turns print PDFs into web optimized ePapers that Google loves.
3. INSTALLATION<br />
3.3.3 Nominal Diameter 50 mm (2.0<br />
in.) to 300 mm (12.0 in.), Wafer<br />
Type<br />
IMPORTANT<br />
Use bolts and nuts in compliance with the flange<br />
ratings. When stud-type through-bolts are used,<br />
be sure the outside diameter of the shank is<br />
smaller than that of the thread ridge. Be sure to<br />
choose a gasket with an inner diameter that<br />
does not protrude inside the piping (refer to<br />
Table 3.3.13). If the inner diameter of the gasket<br />
is too large, however, fluid leakage may result.<br />
(1) Mounting Direction<br />
Mount the flowmeter so that the flow direction of the<br />
fluid to be measured is in line with the direction of the<br />
arrow mark on the flowmeter.<br />
IMPORTANT<br />
If it is impossible to match the direction of the<br />
arrow mark, the direction of the electrical connection<br />
can be changed. Refer to Section 5.1 to<br />
do this properly.<br />
In case the fluid being measured flows against<br />
the arrow direction, refer to the parameter J20:<br />
Flow Direction in the user’s manual of the<br />
<strong>AXF</strong>A11 <strong>Magnetic</strong> <strong>Flowmeter</strong> Remote Converter<br />
(IM 01E20C01-01E) or the <strong>AXF</strong>A14 <strong>Magnetic</strong><br />
<strong>Flowmeter</strong> Remote Converter/<strong>AXF</strong> <strong>Integral</strong><br />
<strong>Flowmeter</strong> [Software Edition] (IM 01E20C02-<br />
01E).<br />
(2) Mounting Centering Devices<br />
To maintain concentricity of the flowmeter with the<br />
pipes, install centering devices. From the process<br />
piping side, pass two through-bolts through the four<br />
centering devices (two for each bolt) and the adjacent<br />
two holes (the lower two holes for horizontal mounting)<br />
of both of the flanges (refer to Figure 3.3.4). Use<br />
the appropriate centering devices according to the<br />
nominal diameter and the flange ratings. The centering<br />
devices are engraved with an identifying character. Use<br />
the appropriate ones which meet the required specifications<br />
by referring to Tables 3.3.10 and 3.3.11 (<strong>AXF</strong><br />
standard models) and Table 3.3.12 (replacement<br />
models for the earlier ADMAG or ADMAG AE).<br />
(3) Positioning the <strong>Flowmeter</strong><br />
Position the flowmeter so that the Mini-flanges and the<br />
centering devices come in close contact with each<br />
other. Be careful to prevent the four centering devices<br />
from coming into contact with the housing. If stud-type<br />
through-bolts are used, position them in such a way<br />
that the four centering devices come in contact with the<br />
bolt threads (refer to Figure 3.3.4). Pass the other<br />
through-bolts through from the process piping side.<br />
NOTE<br />
Precautions for size 125 mm (5 in.), 150 mm<br />
(6 in.), replaceable electrode type<br />
When installing this type of flowmeter with JIS<br />
F12 (JIS 75M) flanges, turn the flowmeter<br />
slightly because the cover of the electrode<br />
chambers will interfere with the bolts.<br />
(4) Tightening Nuts<br />
Tighten the nuts according to the torque values for<br />
metal piping in Table 3.3.7. For PVC piping, select an<br />
optional code of GA, GC, or GD, use rubber gaskets<br />
and tighten the nuts to the torque values for PVC<br />
piping in Table 3.3.8.<br />
For permeable fluids (such as nitric acid, hydrofluoric<br />
acid, or sodium hydrate at high temperatures), tighten<br />
the nuts according to the torque values in Table 3.3.9.<br />
CAUTION<br />
For a flowmeter with fluorocarbon PFA lining, it<br />
is possible that the nuts may loosen as time<br />
passes, so tighten them regularly. Be sure to<br />
tighten the nuts according to the prescribed<br />
torque values. Tighten them diagonally with the<br />
same torque values, step by step up to the<br />
prescribed torque value.<br />
3-10<br />
IM 01E20D01-01E