BaseStation 3200 User Manual â 11.7.5.15 ... - Baseline Systems
BaseStation 3200 User Manual â 11.7.5.15 ... - Baseline Systems
BaseStation 3200 User Manual â 11.7.5.15 ... - Baseline Systems

Create successful ePaper yourself
Turn your PDF publications into a flip-book with our unique Google optimized e-Paper software.
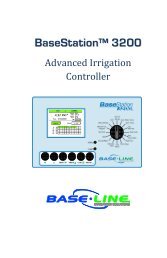
<strong>BaseStation</strong> <strong>3200</strong> Advanced Irrigation Controller <strong>Manual</strong><br />
<strong>BaseStation</strong> <strong>3200</strong>R systems have built-in biCoders, and each screw terminal has a unique serial number. These<br />
serial numbers are listed on the wiring label that is included in the unit as shown in the illustration below.<br />
Serial Numbers for zones 1-24 on a BL-5200 Series Powered biCoder<br />
Powered biCoders are preconfigured at the factory to assign zones 1 to 48 (depending on how many zones the unit<br />
is equipped with) to terminals 1 through 48. However, by using the specific serial number, you can re-map any<br />
terminal to any zone address. Refer to Clearing a Previous Zone Number Assignment on page 38.<br />
Connecting Valve Wires and Moisture Sensors over Valve Wires<br />
You can connect <strong>Baseline</strong> biSensors directly to the valve wires on the Sensor-over-valve-wire Ports (A1, A2, B1, B2)<br />
on any 12 or 24 zone connection module.<br />
BL-5200 Series Powered biCoder Wiring Example with One biSensor<br />
1. Power off the two-wire when installing devices. Leave 24 to 36 inches of slack on the two-wire to allow for<br />
easy installation and maintenance.<br />
2. Wire the sprinkler valves directly to the zone connectors and common connector.<br />
3. Locate the biSensor near the closest valve location.<br />
4. Connect the red wire from the biSensor to the power wire or pilot wire of the valve and black wire from the<br />
biSensor to the common wire of the solenoid using the provided 3M Direct Bury Splice Kit DBR/Y connector.<br />
It is critical that polarity be maintained.<br />
Note: Use wire nuts to test communication, and then replace those wire nuts with 3M Direct Bury Splice Kit<br />
DBR/Y connectors before burying.<br />
5. Follow the “Burying the biSensor” instructions, included with the biSensor.<br />
6. Connect the pilot wire from the valve to the A1, A2, B1, or B2 terminals.<br />
7. Press the biSensor update button and verify that the light above the terminal stays on.<br />
8. Assign the biSensor and test its operation. Refer to Assigning Soil Moisture Sensors (biSensors) to Primary<br />
Zones on page 40 and to Testing Soil Moisture Sensors (biSensors) on page 83.<br />
Page 19