BaseStation 3200 User Manual â 11.7.5.15 ... - Baseline Systems
BaseStation 3200 User Manual â 11.7.5.15 ... - Baseline Systems
BaseStation 3200 User Manual â 11.7.5.15 ... - Baseline Systems
Create successful ePaper yourself
Turn your PDF publications into a flip-book with our unique Google optimized e-Paper software.
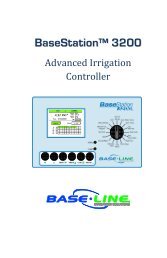
<strong>BaseStation</strong> <strong>3200</strong> Advanced Irrigation Controller <strong>Manual</strong><br />
For problems that fall into the second category, find out what has changed because these factors might provide<br />
some insight or a place to start looking for solutions.<br />
Repairing Device Assignments and Addresses<br />
This process searches for and verifies communication with each of the devices on the two-wire.<br />
Note: <strong>Baseline</strong> recommends that you back up your controller data before you run this process. Refer to Backing Up<br />
Your System on page 71.<br />
The Verify and Repair ALL process does not check the valve current or biSensor readings, and it does not repair any<br />
faulty wiring or electrical connections. However, if it finds discrepancies in assignments or addressing between the<br />
controller and the devices, it will attempt to repair those discrepancies in the following order:<br />
• Repair valve biCoder to zone number assignments<br />
• Repair biSensor addressing<br />
• Repair pause device addressing<br />
• Repair air temperature sensor addressing<br />
1. Turn the dial to the Self-Test position.<br />
2. Press the NEXT or PREV button to select Verify and Repair ALL, and<br />
then press the ENTR button. The Verify and Repair ALL process begins.<br />
When the Verify and Repair ALL process is finished, the controller<br />
displays the Self-Test menu.<br />
3. When you have finished viewing the test results, return the dial to the<br />
Auto Run position.<br />
Troubleshooting the Two-Wire: High Current or Shorted<br />
The first step in troubleshooting the two-wire is to isolate what works from what does not work. A complex system<br />
with many branches in the two-wire path can be difficult to troubleshoot while everything is interconnected.<br />
When a short can be isolated to a single segment of the two-wire system, or to a single component, it becomes<br />
much easier to fix the problem.<br />
In order to isolate the short, you must physically disconnect two-wire segments and components from the system<br />
in a logical manner. Then you can add the two-wire segments and components one at a time in order to isolate the<br />
problem.<br />
• Begin by disconnecting half of the two-wire.<br />
• Next, determine whether the system is running properly with just half of the two-wire connected. If it is, you<br />
know that the short is in the other half of the two-wire. If the system does not run properly, you know that the<br />
problem is in the half of the two-wire that is connected.<br />
• After you have isolated the short to a half of the two-wire, you can start breaking connections, one at a time,<br />
in order to isolate exactly where the problem is.<br />
• After you isolate the short, you need to find out what changed recently that may have caused the problem.<br />
Page 85


