TOPS Pro Tutorial - TOPS - Packaging Software
TOPS Pro Tutorial - TOPS - Packaging Software
TOPS Pro Tutorial - TOPS - Packaging Software

You also want an ePaper? Increase the reach of your titles
YUMPU automatically turns print PDFs into web optimized ePapers that Google loves.
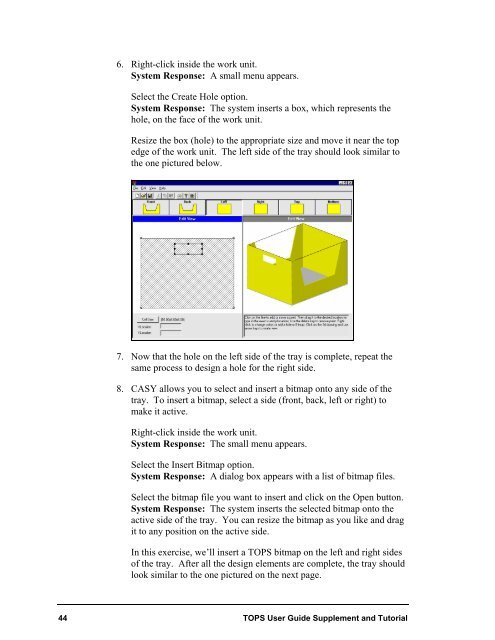
6. Right-click inside the work unit.<br />
System Response: A small menu appears.<br />
Select the Create Hole option.<br />
System Response: The system inserts a box, which represents the<br />
hole, on the face of the work unit.<br />
Resize the box (hole) to the appropriate size and move it near the top<br />
edge of the work unit. The left side of the tray should look similar to<br />
the one pictured below.<br />
7. Now that the hole on the left side of the tray is complete, repeat the<br />
same process to design a hole for the right side.<br />
8. CASY allows you to select and insert a bitmap onto any side of the<br />
tray. To insert a bitmap, select a side (front, back, left or right) to<br />
make it active.<br />
Right-click inside the work unit.<br />
System Response: The small menu appears.<br />
Select the Insert Bitmap option.<br />
System Response: A dialog box appears with a list of bitmap files.<br />
Select the bitmap file you want to insert and click on the Open button.<br />
System Response: The system inserts the selected bitmap onto the<br />
active side of the tray. You can resize the bitmap as you like and drag<br />
it to any position on the active side.<br />
In this exercise, we’ll insert a <strong>TOPS</strong> bitmap on the left and right sides<br />
of the tray. After all the design elements are complete, the tray should<br />
look similar to the one pictured on the next page.<br />
44 <strong>TOPS</strong> User Guide Supplement and <strong>Tutorial</strong>