

MAINTENANCE MANUAL - Meritor
MAINTENANCE MANUAL - Meritor
MAINTENANCE MANUAL - Meritor

Create successful ePaper yourself
Turn your PDF publications into a flip-book with our unique Google optimized e-Paper software.
Assembly and Installation<br />
KEY “T”<br />
6. Proceed to check ring gear runout.<br />
BARS MUST NOT<br />
TOUCH BEARING<br />
Figure 5.38<br />
SQUEEZE EACH<br />
RING IN A GROOVE<br />
Figure 5.39<br />
Large Micrometer Method<br />
1.Hand-tighten the adjusting rings against the<br />
main differential bearings.<br />
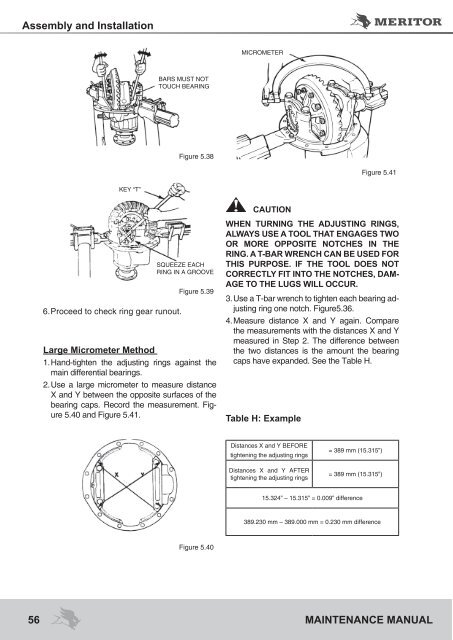
2. Use a large micrometer to measure distance<br />
X and Y between the opposite surfaces of the<br />
bearing caps. Record the measurement. Figure<br />
5.40 and Figure 5.41.<br />
Figure 5.40<br />
MICROMETER<br />
CAUTION<br />
Figure 5.41<br />
WHEN TURNING THE ADjUSTING RINGS,<br />
ALWAYS USE A TOOL THAT ENGAGES TWO<br />
OR MORE OPPOSITE NOTCHES IN THE<br />
RING. A T-BAR WRENCH CAN BE USED FOR<br />
THIS PURPOSE. IF THE TOOL DOES NOT<br />
CORRECTLY FIT INTO THE NOTCHES, DAM-<br />
AGE TO THE LUGS WILL OCCUR.<br />
3. Use a T-bar wrench to tighten each bearing adjusting<br />
ring one notch. Figure5.36.<br />
4. Measure distance X and Y again. Compare<br />
the measurements with the distances X and Y<br />
measured in Step 2. The difference between<br />
the two distances is the amount the bearing<br />
caps have expanded. See the Table H.<br />
Table H: Example<br />
Distances X and Y BEFORE<br />
tightening the adjusting rings<br />
Distances X and Y AFTER<br />
tightening the adjusting rings<br />
= 389 mm (15.315”)<br />
= 389 mm (15.315”)<br />
15.324” – 15.315” = 0.009” difference<br />
389.230 mm – 389.000 mm = 0.230 mm difference<br />
56 <strong>MAINTENANCE</strong> <strong>MANUAL</strong>


