

MAINTENANCE MANUAL - Meritor
MAINTENANCE MANUAL - Meritor
MAINTENANCE MANUAL - Meritor

Create successful ePaper yourself
Turn your PDF publications into a flip-book with our unique Google optimized e-Paper software.
CAUTION<br />
USE A PRESS AND A SLEEVE OR FORk IN-<br />
STALLATION TOOL TO INSTALL THE FORk.<br />
DO NOT USE A HAMMER OR MALLET. USING<br />
A HAMMER OR MALLET CAN DAMAGE THE<br />
BEARINGS, FORk OR FLANGE.<br />
If a fork is removed after it has been partially<br />
or fully installed, the unitized pinion seal will<br />
be damaged. Remove and discard the original<br />
unitized pinion seal and replace it with a new<br />
one.<br />
If a fork has been installed into the unitized pinion<br />
seal and then removed, the inner sleeve of the<br />
seal will be damaged. Install a new seal.<br />
3. Use a press and sleeve or an installation<br />
tool to install the fork or flange in the output<br />
shaft. Verify that the splines inside the fork<br />
or flange are aligned with the splines on the<br />
toutput shaft. If a press and sleeve are used,<br />
verify that the output shaft is supported.<br />
4. Install the nut that fastens the output fork or<br />
flange to the output shaft. Place a holding tool<br />
on the fork or flange and tighten the nut to the<br />
specified torque. See the Section 8.<br />
5. Rotate the fork at least one full turn after<br />
the fork nut is tightened to the correct<br />
torque specification. This ensures correct<br />
seating of the seal.<br />
Differential Assembly of the Axle Housing<br />
WARNING<br />
Solvent cleaners can be flammable, poisonous<br />
and cause burns. Examples of solvent cleaners<br />
are carbon tetrachloride, and emulsion type and<br />
petroleum base cleaners. Read the manufacturer’s<br />
instructions before using a solvent cleaner,<br />
then carefully follow the instructions. Also follow<br />
the procedures below:<br />
• Wear safe eye protection.<br />
• Wear clothing that protects your skin.<br />
• Work in a well ventilated area.<br />
• Do not use gasoline, or solvents that contain<br />
gasoline. Gasoline can explode.<br />
<strong>MAINTENANCE</strong> <strong>MANUAL</strong><br />
Assembly and Installation<br />
• You must use hot solution tanks or alkaline<br />
solutions correctly. Read the manufacturer’s<br />
instructions before using hot solution<br />
tanks and alkaline solutions. Then<br />
carefully follow the instructions<br />
1. Use a cleaning solvent and rags to clean the<br />
inside of the axle housing and the differential<br />
mounting surface. See the Section 4.<br />
2. Inspect the axle housing for damage. Repair or<br />
replace the axle housing. See the Section 4.<br />
3. Check for loose studs, if equipped, in the<br />
mounting surface of the housing where the<br />
differential fastens. Remove and clean<br />
the studs that are loose.<br />
4. Install the studs in the axle housing. See the procedure<br />
in this section. Tighten the studs to 150-<br />
230 lb-ft (203-312 Nem). .<br />
WARNING<br />
When you apply some silicone gasket materials,<br />
a small amount of acid vapor is present. To prevent<br />
serious personal injury, ensure that the work<br />
area is well-ventilated. Read the manufacturer’s<br />
instructions before using a silicone gasket material,<br />
then carefully follow the instructions. If a<br />
silicone gasket material gets into your eyes, follow<br />
the manufacturer’s emergency procedures.<br />
Have your eyes checked by a physician as soon<br />
as possible.<br />
CAUTION<br />
APPLY SILICONE GASkET MATERIAL IN A<br />
CONTINUOUS 0.25-INCH (6 MM) BEAD. IF YOU<br />
USE MORE THAN THIS AMOUNT, GASkET<br />
MATERIAL CAN BREAk OFF AND PLUG LU-<br />
BRICATION PASSAGES. DAMAGE TO COM-<br />
PONENTS CAN RESULT.<br />
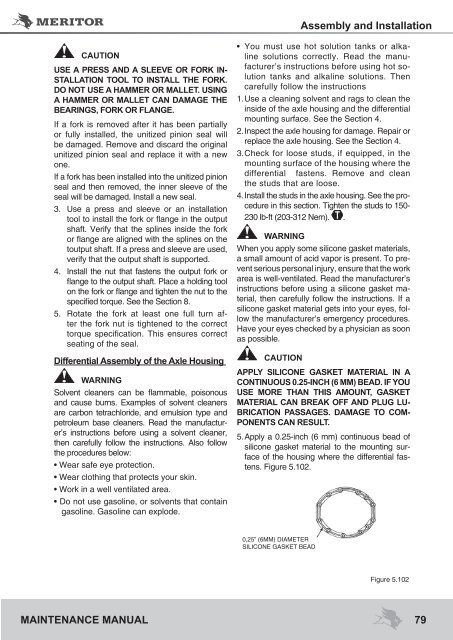
5. Apply a 0.25-inch (6 mm) continuous bead of<br />
silicone gasket material to the mounting surface<br />
of the housing where the differential fastens.<br />
Figure 5.102.<br />
0,25” (6MM) DIAMETER<br />
SILICONE GASKET BEAD<br />
Figure 5.102<br />
79


