
Create successful ePaper yourself
Turn your PDF publications into a flip-book with our unique Google optimized e-Paper software.
Ford OBD1 Systems<br />
ADDITIONAL TESTS FOR EEC-IV SYSTEMS – RELAY AND SOLENOID TEST<br />
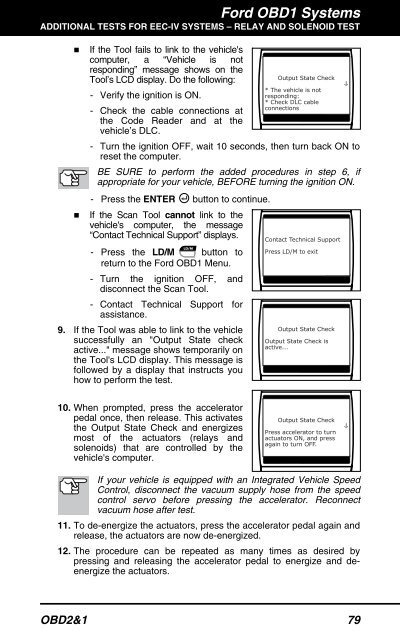
� If the Tool fails to link to the vehicle's<br />
computer, a “Vehicle is not<br />
responding” message shows on the<br />
Tool’s LCD display. Do the following:<br />
- Verify the ignition is ON.<br />
- Check the cable connections at<br />
the Code Reader and at the<br />
vehicle’s DLC.<br />
- Turn the ignition OFF, wait 10 seconds, then turn back ON to<br />
reset the computer.<br />
BE SURE to perform the added procedures in step 6, if<br />
appropriate for your vehicle, BEFORE turning the ignition ON.<br />
- Press the ENTER button to continue.<br />
� If the Scan Tool cannot link to the<br />
vehicle's computer, the message<br />
“Contact Technical Support” displays.<br />
- Press the LD/M button to<br />
return to the Ford OBD1 Menu.<br />
- Turn the ignition OFF, and<br />
disconnect the Scan Tool.<br />
- Contact Technical Support for<br />
assistance.<br />
9. If the Tool was able to link to the vehicle<br />
successfully an "Output State check<br />
active..." message shows temporarily on<br />
the Tool's LCD display. This message is<br />
followed by a display that instructs you<br />
how to perform the test.<br />
10. When prompted, press the accelerator<br />
pedal once, then release. This activates<br />
the Output State Check and energizes<br />
most of the actuators (relays and<br />
solenoids) that are controlled by the<br />
vehicle's computer.<br />
If your vehicle is equipped with an Integrated Vehicle Speed<br />
Control, disconnect the vacuum supply hose from the speed<br />
control servo before pressing the accelerator. Reconnect<br />
vacuum hose after test.<br />
11. To de-energize the actuators, press the accelerator pedal again and<br />
release, the actuators are now de-energized.<br />
12. The procedure can be repeated as many times as desired by<br />
pressing and releasing the accelerator pedal to energize and deenergize<br />
the actuators.<br />
OBD2&1 79