CONELOG® Implant System Prosthetic Restorations - Camlog
CONELOG® Implant System Prosthetic Restorations - Camlog
CONELOG® Implant System Prosthetic Restorations - Camlog

You also want an ePaper? Increase the reach of your titles
YUMPU automatically turns print PDFs into web optimized ePapers that Google loves.
TIP: So that the cast crown framework for veneering can be held with an<br />
artery clip and for better removing from the abutment for the framework<br />
try-in, we recommend attaching a thin wax wire on the palatinal/lingual<br />
area for the wax-up. In practice, the wire also cast can then be removed<br />
before the final insertion.<br />
After the cast is made, the crown is veneered and completed.<br />
TIP: A vestibular mark makes orienting/aligning easier when inserting the<br />
crown in the mouth. This should be identical to the marks made previously<br />
on the abutment and cast. This is particularly helpful with several abutments/crowns.<br />
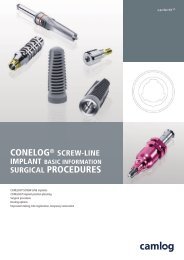
CONELOG ® IMPLANT SYSTEM<br />
PROSTHETIC RESTORATIONS<br />
INSERTING THE CONELOG ® ESTHOMIC ® ABUTMENT<br />
AND THE CEMENTABLE CROWN<br />
Clean and disinfect the prosthetic components prior to insertion. We recommend<br />
additional sterilization. Clean the internal configuration of the<br />
implant with water spray, check for residues and allow to dry. The peri-<br />
implant hard and soft tissue situation must allow gapless insertion of the<br />
CONELOG ® Esthomic ® abutment and crown.<br />
To insert, the abutment mark is vestibularly oriented and the abutment slid<br />
into the implant. After seating the cams in the CONELOG ® implant internal<br />
configuration, the CONELOG ® abutment is lightly rotated until the cams<br />
noticeably slide into the grooves of the CONELOG ® implant. The CONELOG ®<br />
abutment sinks 1.2 mm into the internal configuration of the implant.<br />
43