You also want an ePaper? Increase the reach of your titles
YUMPU automatically turns print PDFs into web optimized ePapers that Google loves.
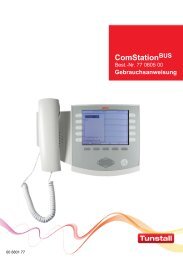
<strong>Tunstall</strong> <strong>GmbH</strong>, Orkotten 66, D-48291 Telgte, www.tunstall.de<br />
Management Interface, Order no. 19 0700 00<br />
Interface for transferring call and system messages, speech<br />
phrases, and connection to speech communication via PBX. Ad‐<br />
ditional interfaces for system administration and for transmission<br />
of recorded data. Connection to the group bus or to a ward bus.<br />
Only 1 Management Interface per group bus.<br />
Only 1 Management Interface per ward bus.<br />
Dimensions (HxWxD): 135 x 190 x 90 mm, weight: approx. 640 g<br />
Current consumption: 240 mA at +24 V DC<br />
Note! The complete installation of the system is<br />
described in the <strong>Technical</strong> <strong>Manual</strong>.<br />
Caution! Electrostatic sensitive components<br />
The printed circuit boards within the control panel 1<br />
include electrostatic sensitive components. Therefore<br />
avoid touching.<br />
Dismantling<br />
1. Use a screw driver to turn both locks 6 to position “open“, see<br />
Fig. B.<br />
2. Hold the control panel 1 with both hands and push both fixing<br />
clips 5 simultaneously.<br />
3. Detach control panel 1 carefully. Caution! Control panel and<br />
base are interconnected via a flat cable 7, see Fig. C.<br />
4. Disconnect flat cable 7 from base 2.<br />
Mounting<br />
Fix the Management Interface to the wall on a one gang back<br />
box or on a cable duct.<br />
1. Strip the connection cable to the appropriate length. Remove<br />
the cable shield and ground wire up to the cable sheath.<br />
2. Fix base 2 at the four mounting holes to the wall using screws<br />
and dowels.<br />
3. Lead the connection wires through the opening in the base 2.<br />
Note! Only one a/b connection may be made either at the con‐<br />
nection field 8 or at the RJ11 socket 9.<br />
4. If you want to use the Management Interface on the group<br />
bus, connect the connection wires according to Fig. E. If you<br />
want to use the Management Interface on a ward bus,<br />
connect the connection wires according to Fig. F.<br />
5. Set jumper JP1 in the control panel 1 to ON position<br />
according to Fig. D. JP1 activates a Li battery for the clock<br />
module as voltage buffer in case of power failure.<br />
6. If you install the Management Interface in an existing nurse<br />
call system with speech transmission, you have to slide the<br />
slide switch according to Fig. D.<br />
You have to slide the slide switch to „Concento“ position, if<br />
one of the following conditions is met:<br />
- Min. one group electronic has the order no. 10 0700 10.<br />
- Min. at one group electronic of order no. 19 0700 10 the<br />
slide switch is set to the upwards „Concento“ position<br />
(refer to product leaflet for group electronic).<br />
7. Set jumper JP3 according to Fig. E or F.<br />
8. Connect flat cable 7.<br />
9. Press control panel 1 to the base 2 until it audibly snaps in.<br />
10.Use a screw driver to turn both locks 6 to position “secured”,<br />
see Fig. B.<br />
11. Attach the patch cords to the connectors 9 according to Fig.<br />
G.<br />
00 8814 00, 10/12 (Rev. 4.0) 1<br />
<strong>Technical</strong> <strong>Manual</strong> Page 127<br />
1<br />
1 Control panel (with electronics)<br />
2 Base (with connection field)<br />
3 Keypad<br />
4 Display<br />
5 Fixing clip<br />
6 Lock<br />
7 Flat cable<br />
8 Connection field<br />
9 Connectors<br />
6 open =<br />
6 secured =<br />
9<br />
7<br />
4<br />
9<br />
9<br />
1<br />
3<br />
5<br />
7<br />
8<br />
2<br />
1<br />
2<br />
2<br />
5<br />
6<br />
Slide switch:<br />
= CONCENTO PLUS (factory setting)<br />
= Concento<br />
JP1<br />
5<br />
6<br />
JP1:<br />
= OFF<br />
= ON<br />
In operation jumper JP1 must<br />
always be set to ON position.<br />
1