SYCON.net PROFIBUS DP Slave DTM
SYCON.net PROFIBUS DP Slave DTM
SYCON.net PROFIBUS DP Slave DTM

Create successful ePaper yourself
Turn your PDF publications into a flip-book with our unique Google optimized e-Paper software.
Settings 40/132<br />
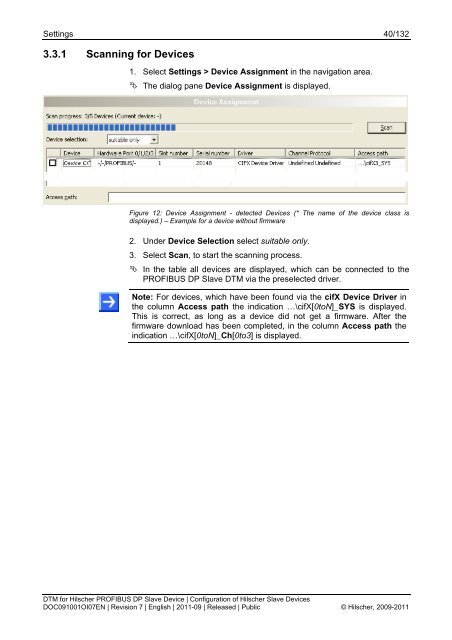
3.3.1 Scanning for Devices<br />
1. Select Settings > Device Assignment in the navigation area.<br />
The dialog pane Device Assignment is displayed.<br />
Figure 12: Device Assignment - detected Devices (* The name of the device class is<br />
displayed.) – Example for a device without firmware<br />
2. Under Device Selection select suitable only.<br />
3. Select Scan, to start the scanning process.<br />
In the table all devices are displayed, which can be connected to the<br />
<strong>PROFIBUS</strong> <strong>DP</strong> <strong>Slave</strong> <strong>DTM</strong> via the preselected driver.<br />
Note: For devices, which have been found via the cifX Device Driver in<br />
the column Access path the indication …\cifX[0toN]_SYS is displayed.<br />
This is correct, as long as a device did not get a firmware. After the<br />
firmware download has been completed, in the column Access path the<br />
indication …\cifX[0toN]_Ch[0to3] is displayed.<br />
<strong>DTM</strong> for Hilscher <strong>PROFIBUS</strong> <strong>DP</strong> <strong>Slave</strong> Device | Configuration of Hilscher <strong>Slave</strong> Devices<br />
DOC091001OI07EN | Revision 7 | English | 2011-09 | Released | Public © Hilscher, 2009-2011