GL900 USER'S MANUAL
GL900 USER'S MANUAL
GL900 USER'S MANUAL

You also want an ePaper? Increase the reach of your titles
YUMPU automatically turns print PDFs into web optimized ePapers that Google loves.
Checks and Preparation<br />
Charging the Battery<br />
You can mount either one or two battery packs when you charge them.<br />
Expected time required for charging: • battery pack x 1: approx. 4 hours<br />
• battery pack x 2: approx. 8 hours<br />
The battery pack is charged by mounting it in the <strong>GL900</strong>, attaching AC adapter to the <strong>GL900</strong>.<br />
(1) Mount the battery pack in the <strong>GL900</strong> (see the previous section for the mounting procedure).<br />
(2) Turn on the power to the <strong>GL900</strong>. (Please see Section 2.4, "Connecting the Power Cable and<br />
Turning on the Power").<br />
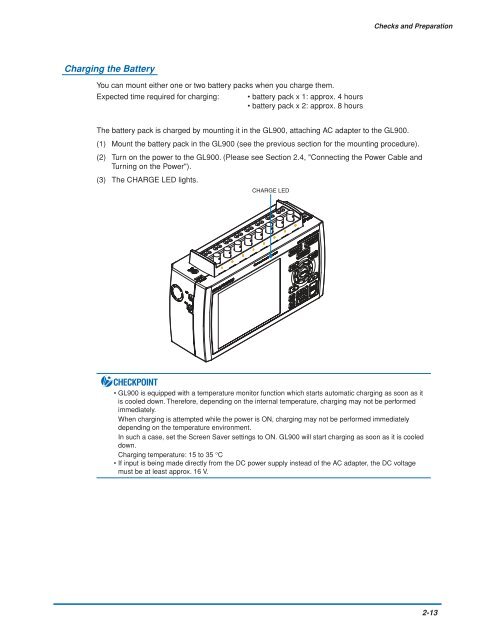
(3) The CHARGE LED lights.<br />
CHARGE LED<br />
CHECKPOINT<br />
• <strong>GL900</strong> is equipped with a temperature monitor function which starts automatic charging as soon as it<br />
is cooled down. Therefore, depending on the internal temperature, charging may not be performed<br />
immediately.<br />
When charging is attempted while the power is ON, charging may not be performed immediately<br />
depending on the temperature environment.<br />
In such a case, set the Screen Saver settings to ON. <strong>GL900</strong> will start charging as soon as it is cooled<br />
down.<br />
Charging temperature: 15 to 35 °C<br />
• If input is being made directly from the DC power supply instead of the AC adapter, the DC voltage<br />
must be at least approx. 16 V.<br />
2-13