

ECOPROBE 5 - rs dynamics
ECOPROBE 5 - rs dynamics
ECOPROBE 5 - rs dynamics

Create successful ePaper yourself
Turn your PDF publications into a flip-book with our unique Google optimized e-Paper software.
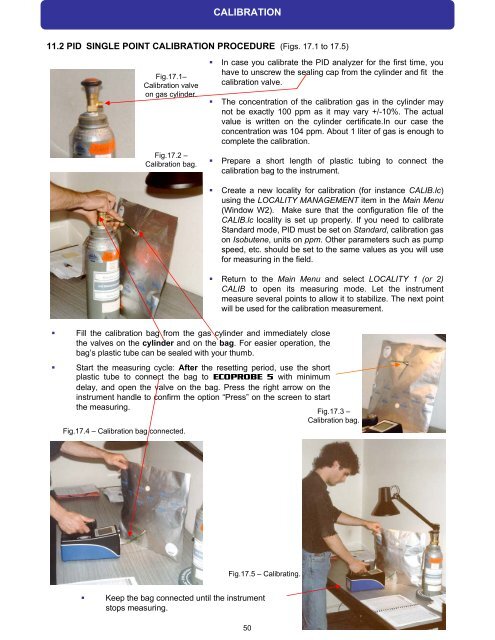
11.2 PID SINGLE POINT CALIBRATION PROCEDURE (Figs. 17.1 to 17.5)<br />
� In case you calibrate the PID analyzer for the fi<strong>rs</strong>t time, you<br />
have to unscrew the sealing cap from the cylinder and fit the<br />
calibration valve.<br />
� The concentration of the calibration gas in the cylinder may<br />
not be exactly 100 ppm as it may vary +/-10%. The actual<br />
value is written on the cylinder certificate.In our case the<br />
concentration was 104 ppm. About 1 liter of gas is enough to<br />
complete the calibration.<br />
� Prepare a short length of plastic tubing to connect the<br />
calibration bag to the instrument.<br />
� Create a new locality for calibration (for instance CALIB.lc)<br />
using the LOCALITY MANAGEMENT item in the Main Menu<br />
(Window W2). Make sure that the configuration file of the<br />
CALIB.lc locality is set up properly. If you need to calibrate<br />
Standard mode, PID must be set on Standard, calibration gas<br />
on Isobutene, units on ppm. Other paramete<strong>rs</strong> such as pump<br />
speed, etc. should be set to the same values as you will use<br />
for measuring in the field.<br />
� Return to the Main Menu and select LOCALITY 1 (or 2)<br />
CALIB to open its measuring mode. Let the instrument<br />
measure several points to allow it to stabilize. The next point<br />
will be used for the calibration measurement.<br />
� Fill the calibration bag from the gas cylinder and immediately close<br />
the valves on the cylinder and on the bag. For easier operation, the<br />
bag’s plastic tube can be sealed with your thumb.<br />
� Start the measuring cycle: After the resetting period, use the short<br />
plastic tube to connect the bag to <strong>ECOPROBE</strong> 5 with minimum<br />
delay, and open the valve on the bag. Press the right arrow on the<br />
instrument handle to confirm the option “Press” on the screen to start<br />
the measuring.<br />
Fig.17.1–<br />
Calibration valve<br />
on gas cylinder.<br />
Fig.17.2 –<br />
Calibration bag.<br />
Fig.17.4 – Calibration bag connected.<br />
CALIBRATION<br />
Fig.17.5 – Calibrating.<br />
� Keep the bag connected until the instrument<br />
stops measuring.<br />
50<br />
Fig.17.3 –<br />
Calibration bag.