Installation Manual
Installation Manual
Installation Manual

Create successful ePaper yourself
Turn your PDF publications into a flip-book with our unique Google optimized e-Paper software.
3. Place the batteries flat in the unit and close it.<br />
4. Turn off the switch, and check the battery voltage directly on the connector at the rear of<br />
the unit.<br />
Preparing an external battery unit (stack version)<br />
Before starting the installation, note that:<br />
- External batteries must be of the same type, must be supplied by the same manufacturer<br />
and be from the same batch run.<br />
- Batteries must be charged prior to installation.<br />
Procedure for 12 V stack version (for S and M systems)<br />
������������ ��� �������<br />
The 12 V stack version of the external battery unit can used with S and M systems. It uses 12V<br />
- 7Ah batteries. Either one battery or three batteries can be installed in the unit.<br />
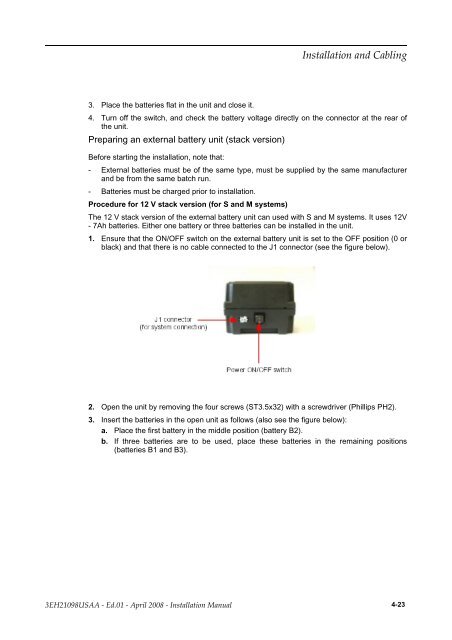
1. Ensure that the ON/OFF switch on the external battery unit is set to the OFF position (0 or<br />
black) and that there is no cable connected to the J1 connector (see the figure below).<br />
2. Open the unit by removing the four screws (ST3.5x32) with a screwdriver (Phillips PH2).<br />
3. Insert the batteries in the open unit as follows (also see the figure below):<br />
a. Place the first battery in the middle position (battery B2).<br />
b. If three batteries are to be used, place these batteries in the remaining positions<br />
(batteries B1 and B3).<br />
������������ � ����� � ����� ���� � ������������ ������ 4-23