Installation Manual
Installation Manual
Installation Manual

Create successful ePaper yourself
Turn your PDF publications into a flip-book with our unique Google optimized e-Paper software.
Chapter 4 ������������ ��� �������<br />
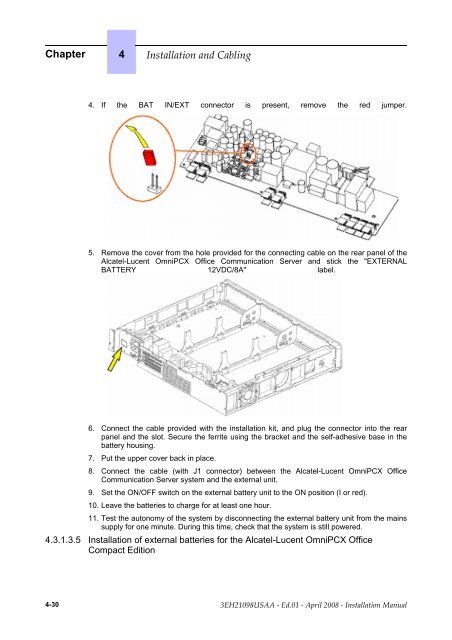
4. If the BAT IN/EXT connector is present, remove the red jumper.<br />
5. Remove the cover from the hole provided for the connecting cable on the rear panel of the<br />
Alcatel-Lucent OmniPCX Office Communication Server and stick the "EXTERNAL<br />
BATTERY 12VDC/8A" label.<br />
6. Connect the cable provided with the installation kit, and plug the connector into the rear<br />
panel and the slot. Secure the ferrite using the bracket and the self-adhesive base in the<br />
battery housing.<br />
7. Put the upper cover back in place.<br />
8. Connect the cable (with J1 connector) between the Alcatel-Lucent OmniPCX Office<br />
Communication Server system and the external unit.<br />
9. Set the ON/OFF switch on the external battery unit to the ON position (I or red).<br />
10. Leave the batteries to charge for at least one hour.<br />
11. Test the autonomy of the system by disconnecting the external battery unit from the mains<br />
supply for one minute. During this time, check that the system is still powered.<br />
4.3.1.3.5 <strong>Installation</strong> of external batteries for the Alcatel-Lucent OmniPCX Office<br />
Compact Edition<br />
4-30 ������������ � ����� � ����� ���� � ������������ ������