1 The AVM ISDN-Controller B1 PCI v4.0 - VoipAndGo
1 The AVM ISDN-Controller B1 PCI v4.0 - VoipAndGo
1 The AVM ISDN-Controller B1 PCI v4.0 - VoipAndGo

Create successful ePaper yourself
Turn your PDF publications into a flip-book with our unique Google optimized e-Paper software.
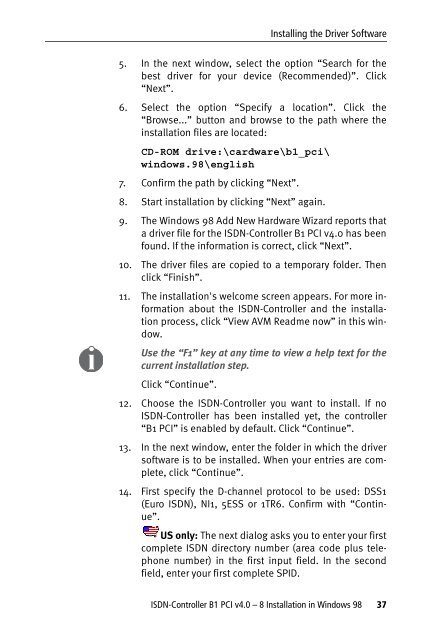
Installing the Driver Software<br />
5. In the next window, select the option “Search for the<br />
best driver for your device (Recommended)”. Click<br />
“Next”.<br />
6. Select the option “Specify a location”. Click the<br />
“Browse...” button and browse to the path where the<br />
installation files are located:<br />
CD-ROM drive:\cardware\b1_pci\<br />
windows.98\english<br />
7. Confirm the path by clicking “Next”.<br />
8. Start installation by clicking “Next” again.<br />
9. <strong>The</strong> Windows 98 Add New Hardware Wizard reports that<br />
a driver file for the <strong>ISDN</strong>-<strong>Controller</strong> <strong>B1</strong> <strong>PCI</strong> <strong>v4.0</strong> has been<br />
found. If the information is correct, click “Next”.<br />
10. <strong>The</strong> driver files are copied to a temporary folder. <strong>The</strong>n<br />
click “Finish”.<br />
11. <strong>The</strong> installation's welcome screen appears. For more information<br />
about the <strong>ISDN</strong>-<strong>Controller</strong> and the installation<br />
process, click “View <strong>AVM</strong> Readme now” in this window.<br />
Use the “F1” key at any time to view a help text for the<br />
current installation step.<br />
Click “Continue”.<br />
12. Choose the <strong>ISDN</strong>-<strong>Controller</strong> you want to install. If no<br />
<strong>ISDN</strong>-<strong>Controller</strong> has been installed yet, the controller<br />
“<strong>B1</strong> <strong>PCI</strong>” is enabled by default. Click “Continue”.<br />
13. In the next window, enter the folder in which the driver<br />
software is to be installed. When your entries are complete,<br />
click “Continue”.<br />
14. First specify the D-channel protocol to be used: DSS1<br />
(Euro <strong>ISDN</strong>), NI1, 5ESS or 1TR6. Confirm with “Continue”.<br />
US only: <strong>The</strong> next dialog asks you to enter your first<br />
complete <strong>ISDN</strong> directory number (area code plus telephone<br />
number) in the first input field. In the second<br />
field, enter your first complete SPID.<br />
<strong>ISDN</strong>-<strong>Controller</strong> <strong>B1</strong> <strong>PCI</strong> <strong>v4.0</strong> – 8 Installation in Windows 98 37