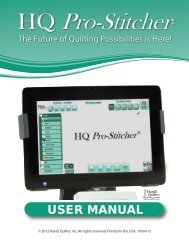
HQ Pro-Stitcher User Manual - Handi Quilter
HQ Pro-Stitcher User Manual - Handi Quilter
HQ Pro-Stitcher User Manual - Handi Quilter
Create successful ePaper yourself
Turn your PDF publications into a flip-book with our unique Google optimized e-Paper software.
Installation<br />
<strong>HQ</strong> 24 Fusion<br />
<strong>HQ</strong> 18 Avanté (8-wheel Precision-Glide carriage version)<br />
Tools Required<br />
Power drill<br />
4mm Allen wrench<br />
5mm Allen wrench<br />
Slotted screwdriver (one large and one small)<br />
Phillips screwdriver (one large and one small)<br />
Assembly<br />
<strong>Handi</strong> <strong>Quilter</strong> recommends installation by an authorized<br />
<strong>HQ</strong> <strong>Pro</strong>-<strong>Stitcher</strong> Representative.<br />
X-Rack Installation<br />
1. Remove the blue 12-foot rack (Page 3, A) and the<br />
<strong>HQ</strong> <strong>Pro</strong>-<strong>Stitcher</strong> carriage (E) from the box. Cut the<br />
cable ties from the front of the carriage (see Figure<br />
1).<br />
2. Starting at one end of the table, begin mounting<br />
the blue rack to the table. Peel back just a few<br />
inches of the protective layer of the tape. Position<br />
the blue rack using the wooden alignment block (M)<br />
as a guide. The wood block should be laid flat on the<br />
black plastic table top, butted against the inside edge<br />
of the front aluminum track extrusion (see<br />
Figure 2). The blue rack then butts against the opposite<br />
side of the block so the blue rack is mounted<br />
2” away from the front track. The block should be<br />
flat on the table and not on top of the blue rack or<br />
the aluminum extrusion. Press down on the blue<br />
rack to stick it firmly to the table. Pull the pink<br />
protective layer from the back side of the rack while<br />
shifting the block down the length of the table until<br />
about two feet of the rack have been mounted.<br />
3. Place the <strong>HQ</strong> <strong>Pro</strong>-<strong>Stitcher</strong> carriage on the frame<br />
and verify that the front white gear is aligned with<br />
the blue rack that has just been mounted to the<br />
table top.<br />
Page 4<br />
Figure 1<br />
Figure 2<br />
<strong>HQ</strong> <strong>Pro</strong>-<strong>Stitcher</strong> <strong>User</strong> <strong>Manual</strong>


