User Manual - Hasselblad.jp
User Manual - Hasselblad.jp
User Manual - Hasselblad.jp

Create successful ePaper yourself
Turn your PDF publications into a flip-book with our unique Google optimized e-Paper software.
Deleting images − general<br />
Delete shortcut !<br />
There is also a one-button shortcut<br />
for deleting single images.<br />
To use it, select a target image<br />
and then press and hold the <br />
until the confirm-delete dialog<br />
opens.<br />
The CFVII enables you to delete images using any of the following techniques:<br />
• Delete the currently selected image only.<br />
• Delete all images from the current batch<br />
• Delete all images from the current medium<br />
• Delete all red-status images from the current batch<br />
• Delete all red-status images from the current medium<br />
• Delete all red- or yellow-status images from the current batch<br />
• Delete all red- or yellow-status images from the current medium<br />
Another way of working is to simply assign unwanted images as Red. In this way, you<br />
retain the option (for a while) of changing your mind later while allowing the system<br />
to automatically delete the unwanted images as the storage medium fills up.<br />
You will always be asked to confirm each delete operation.<br />
For complete details about how to use the menu system to delete single or multiple images,<br />
please see MENU > STORAGE > Delete.<br />
Transferring images<br />
Transferring to a computer<br />
To transfer images stored on the compact-flash card to your computer, simply connect<br />
the digital capture unit to a computer using a FireWire cable and then run FlexColor<br />
or Phocus, which will automate the process. See your FlexColor or Phocus manual for<br />
details.<br />
See also Connecting to the Computer for details about how to connect to a computer.<br />
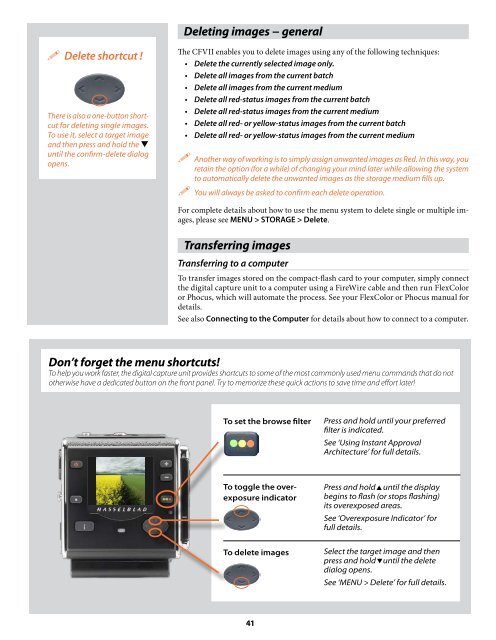
Don’t forget the menu shortcuts!<br />
To help you work faster, the digital capture unit provides shortcuts to some of the most commonly used menu commands that do not<br />
otherwise have a dedicated button on the front panel. Try to memorize these quick actions to save time and effort later!<br />
To set the browse filter<br />
Press and hold until your preferred<br />
filter is indicated.<br />
See ‘Using Instant Approval<br />
Architecture’ for full details.<br />
To toggle the overexposure<br />
indicator<br />
Press and holduntil the display<br />
begins to flash (or stops flashing)<br />
its overexposed areas.<br />
See ‘Overexposure Indicator’ for<br />
full details.<br />
To delete images<br />
Select the target image and then<br />
press and holduntil the delete<br />
dialog opens.<br />
See ‘MENU > Delete’ for full details.<br />
41