User Manual - Hasselblad.jp
User Manual - Hasselblad.jp
User Manual - Hasselblad.jp

You also want an ePaper? Increase the reach of your titles
YUMPU automatically turns print PDFs into web optimized ePapers that Google loves.
1 2<br />
As a practical example, a MENU > SETTINGS > USER INTERFACE<br />
> Language choice item would involve the following procedure:<br />
1. Press the menu (MENU) button to open the menu.<br />
2. Use and to select the SETTINGS sub-menu.<br />
3. Press to open the SETTINGS menu.<br />
4. Press to select the USER INTERFACE sub-menu.<br />
3 4<br />
5. Press either the or button to choose a new language (in<br />
this case Spanish).<br />
6. Press the MENU/EXIT button again to close the menu.<br />
5 6<br />
Note also that the menu and approval buttons are situated just<br />
outside the bottom-left and bottom-right corners of the screen.<br />
As you work through the various menu items, the screen shows<br />
a label for each of these buttons. In the text, we therefore give the<br />
generic name for the button and the screen name. For example we<br />
will refer to: the menu (MENU) button, the menu (EXIT) button,<br />
or the approval (OK) button.<br />
Settings check<br />
1<br />
2 3<br />
ISO, White Balance, Media and Browse settings should be<br />
checked before each session. They are therefore placed at the top<br />
level of the menu for quick and easy access. They are also shown<br />
on-screen in most preview modes, so you can easily keep an eye<br />
on them as your work.<br />
ISO<br />
The digital capture unit can be set to use a light-sensitivity rating<br />
equivalent to ISO 50, 100, 200 or 400 film. Note, however, that<br />
the “natural” sensitivity of the CCD is ISO 50, so you will get best<br />
results with this setting if the light conditions allow.<br />
To set the ISO:<br />
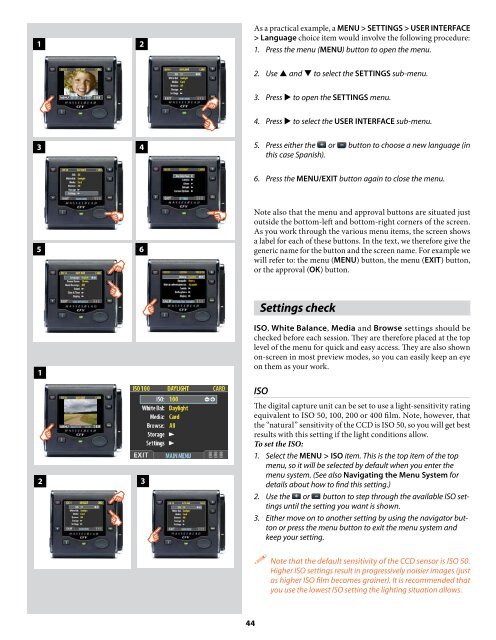
1. Select the MENU > ISO item. This is the top item of the top<br />
menu, so it will be selected by default when you enter the<br />
menu system. (See also Navigating the Menu System for<br />
details about how to find this setting.)<br />
2. Use the or button to step through the available ISO settings<br />
until the setting you want is shown.<br />
3. Either move on to another setting by using the navigator button<br />
or press the menu button to exit the menu system and<br />
keep your setting.<br />
Note that the default sensitivity of the CCD sensor is ISO 50.<br />
Higher ISO settings result in progressively noisier images (just<br />
as higher ISO film becomes grainer). It is recommended that<br />
you use the lowest ISO setting the lighting situation allows.<br />
44