User Manual - Hasselblad.jp
User Manual - Hasselblad.jp
User Manual - Hasselblad.jp

Create successful ePaper yourself
Turn your PDF publications into a flip-book with our unique Google optimized e-Paper software.
3<br />
4<br />
<br />
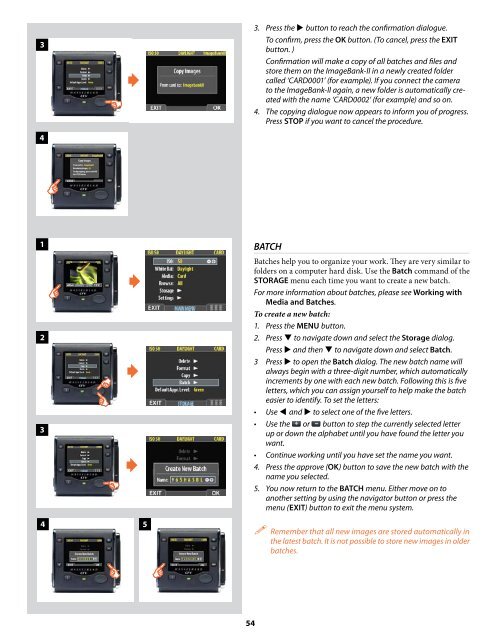
3. Press the button to reach the confirmation dialogue.<br />
To confirm, press the OK button. (To cancel, press the EXIT<br />
button. )<br />
Confirmation will make a copy of all batches and files and<br />
store them on the ImageBank-II in a newly created folder<br />
called ‘CARD0001’ (for example). If you connect the camera<br />
to the ImageBank-ll again, a new folder is automatically created<br />
with the name ‘CARD0002’ (for example) and so on.<br />
4. The copying dialogue now appears to inform you of progress.<br />
Press STOP if you want to cancel the procedure.<br />
1<br />
2<br />
3<br />
4<br />
<br />
<br />
<br />
5<br />
BATCH<br />
Batches help you to organize your work. They are very similar to<br />
folders on a computer hard disk. Use the Batch command of the<br />
STORAGE menu each time you want to create a new batch.<br />
For more information about batches, please see Working with<br />
Media and Batches.<br />
To create a new batch:<br />
1. Press the MENU button.<br />
2. Press to navigate down and select the Storage dialog.<br />
Press and then to navigate down and select Batch.<br />
3 Press to open the Batch dialog. The new batch name will<br />
always begin with a three-digit number, which automatically<br />
increments by one with each new batch. Following this is five<br />
letters, which you can assign yourself to help make the batch<br />
easier to identify. To set the letters:<br />
• Use and to select one of the five letters.<br />
• Use the or button to step the currently selected letter<br />
up or down the alphabet until you have found the letter you<br />
want.<br />
• Continue working until you have set the name you want.<br />
4. Press the approve (OK) button to save the new batch with the<br />
name you selected.<br />
5. You now return to the BATCH menu. Either move on to<br />
another setting by using the navigator button or press the<br />
menu (EXIT) button to exit the menu system.<br />
Remember that all new images are stored automatically in<br />
the latest batch. It is not possible to store new images in older<br />
batches.<br />
54