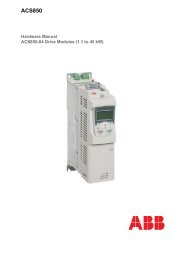
en/ACS800-04/U4 Hardware Manuals - VAE ProSys sro
en/ACS800-04/U4 Hardware Manuals - VAE ProSys sro
en/ACS800-04/U4 Hardware Manuals - VAE ProSys sro

Create successful ePaper yourself
Turn your PDF publications into a flip-book with our unique Google optimized e-Paper software.
71Installation of optional modules and PCThe optional module (such as fieldbus adapter, I/O ext<strong>en</strong>sion module and the pulse<strong>en</strong>coder interface) is inserted in the optional module slot of the RMIO board (seesection Connecting the control cables) and fixed with two screws. See theappropriate optional module manual for cable connections.Fibre optic linkA DDCS fibre optic link is provided via the RDCO optional module for PC tools,master/follower link, NDIO, NTAC, NAIO and fieldbus adapter modules of type Nxxx.See RDCO User’s Manual for connections. Observe colouring codes wh<strong>en</strong> installingfibre optic cables. Blue connectors go to blue terminals, and grey connectors to greyterminals.Wh<strong>en</strong> installing multiple modules on the same channel connect them in a ring.External +24 V power supply for the RMIO board via terminal X34This section describes how to connect an external +24 V power supply for the RMIOboard via terminal X34. For the curr<strong>en</strong>t consumption of the RMIO board, see chapterMotor control and I/O board (RMIO).Note: External power is easier to supply to the RMIO board via terminal X23, seechapter Motor control and I/O board (RMIO).Parameter settingsIn Standard Control Program, set parameter 16.09 CTRL BOARD SUPPLY toEXTERNAL 24V if the RMIO board is powered from an external supply.Connecting +24 V external power supply1. Break off the tab covering the +24 V DC power input connector with pliers.2. Lift the connector upwards.3. Disconnect the wires from the connector (keep the connector for later use).4. Isolate the <strong>en</strong>ds of the wires individually with insulating tape.5. Cover the isolated <strong>en</strong>ds of the wires with insulating tape.6. Push the wires inside the skeleton.7. Connect the wires of the +24 V external power supply to the disconnectedconnector:if a two-way connector, + wire to terminal 1 and - wire to terminal 2if a three-way connector, + wire to terminal 2 and - wire to terminal 3.8. Plug the connector in.Electrical installation