Art and Design A comprehensive guide for creative artists - Aaltodoc
Art and Design A comprehensive guide for creative artists - Aaltodoc
Art and Design A comprehensive guide for creative artists - Aaltodoc

Create successful ePaper yourself
Turn your PDF publications into a flip-book with our unique Google optimized e-Paper software.
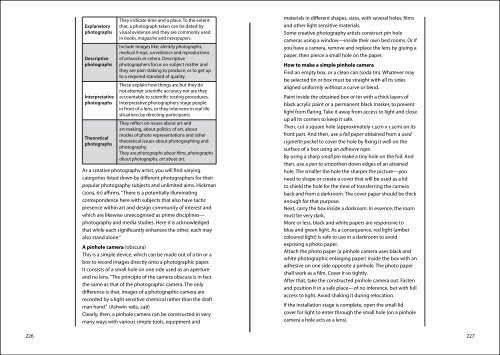
Explanatory<br />
photographs<br />
Descriptive<br />
photographs<br />
Interpretative<br />
photographs<br />
Theoretical<br />
photographs<br />
They indicate time <strong>and</strong> a place. To the extent<br />
that, a photograph taken can be dated by<br />
visual evidence <strong>and</strong> they are commonly used<br />
in books, magazine <strong>and</strong> newspapers.<br />
Include images like; identity photographs,<br />
medical X-rays, surveillance <strong>and</strong> reproductions<br />
of artworks et cetera. Descriptive<br />
photographers focus on subject matter <strong>and</strong><br />
they are pain staking to produce, or to get up<br />
to a required st<strong>and</strong>ard of quality.<br />
These explain how things are but they do<br />
not attempt scientific accuracy nor are they<br />
accountable to scientific testing procedures.<br />
Interpretative photographers’ stage people<br />
in front of a lens, or they intervene in real life<br />
situations by directing participants.<br />
They reflect on issues about art <strong>and</strong><br />
art making, about politics of art, about<br />
modes of photo representations <strong>and</strong> other<br />
theoretical issues about photographing <strong>and</strong><br />
photography.<br />
They are photographs about films, photographs<br />
about photographs, art about art.<br />
As a <strong>creative</strong> photography artist, you will find varying<br />
categories listed down by different photographers <strong>for</strong> their<br />
popular photography subjects <strong>and</strong> unlimited aims. Hickman<br />
(2005, 61) affirms, “There is a potentially illuminating<br />
correspondence here with subjects that also have tactic<br />
presence within art <strong>and</strong> design community of interest <strong>and</strong><br />
which are likewise unrecognised as prime disciplines—<br />
photography <strong>and</strong> media studies. Here it is acknowledged<br />
that while each significantly enhances the other, each may<br />
also st<strong>and</strong> alone.”<br />
A pinhole camera (obscura)<br />
This is a simple device, which can be made out of a tin or a<br />
box to record images directly onto a photographic paper.<br />
It consists of a small hole on one side used as an aperture<br />
<strong>and</strong> no lens. “The principle of the camera obscura is in fact<br />
the same as that of the photographic camera. The only<br />
difference is that, images of a photographic camera are<br />
recorded by a light sensitive chemical rather than the draft<br />
man h<strong>and</strong>.” (Ashwin 1982, 248)<br />
Clearly, then, a pinhole camera can be constructed in very<br />
many ways with various simple tools, equipment <strong>and</strong><br />
materials in different shapes, sizes, with several holes, films<br />
<strong>and</strong> other light sensitive materials.<br />
Some <strong>creative</strong> photography <strong>artists</strong> construct pin hole<br />
cameras using a window—inside their own bed rooms. Or if<br />
you have a camera, remove <strong>and</strong> replace the lens by gluing a<br />
paper, then pierce a small hole on the paper.<br />
How to make a simple pinhole camera<br />
Find an empty box, or a clean can (soda tin). Whatever may<br />
be selected tin or box must be straight with all its sides<br />
aligned uni<strong>for</strong>mly without a curve or bend.<br />
Paint inside the obtained box or tin with a thick layers of<br />
black acrylic paint or a permanent black marker, to prevent<br />
light from flaring. Take it away from access to light <strong>and</strong> close<br />
up all its corners to keep it safe.<br />
Then, cut a square hole (approximately 1.5cm x 1.5cm) on its<br />
front part. And then, use a foil paper obtained from a used<br />
cigarette packet to cover the hole by fixing it well on the<br />
surface of a box using an adhesive tape.<br />
By using a sharp small pin make a tiny hole on the foil. And<br />
then, use a pen to smoothen down edges of an attained<br />
hole. The smaller the hole the sharper the picture—you<br />
need to shape or create a cover that will be used as a lid<br />
to shield the hole <strong>for</strong> the time of transferring the camera<br />
back <strong>and</strong> from a darkroom. The cover paper should be thick<br />
enough <strong>for</strong> that purpose.<br />
Next, carry the box inside a darkroom. In essence, the room<br />
must be very dark.<br />
More or less, black <strong>and</strong> white papers are responsive to<br />
blue <strong>and</strong> green light. As a consequence, red light (amber<br />
coloured light) is safe to use in a darkroom to avoid<br />
exposing a photo paper.<br />
Attach the photo paper (a pinhole camera uses black <strong>and</strong><br />
white photographic enlarging paper) inside the box with an<br />
adhesive on one side opposite a pinhole. The photo paper<br />
shall work as a film. Cover it so tightly.<br />
After that, take the constructed pinhole camera out. Fasten<br />
<strong>and</strong> position it in a safe place—of no inference, but with full<br />
access to light. Avoid shaking it during relocation.<br />
If the installation stage is complete, open the small lid<br />
cover <strong>for</strong> light to enter through the small hole (on a pinhole<br />
camera a hole acts as a lens).<br />
226 227