

Brother XL-6053/6063 - Guide utilisateur
Brother XL-6053/6063 - Guide utilisateur
Brother XL-6053/6063 - Guide utilisateur

You also want an ePaper? Increase the reach of your titles
YUMPU automatically turns print PDFs into web optimized ePapers that Google loves.
1<br />
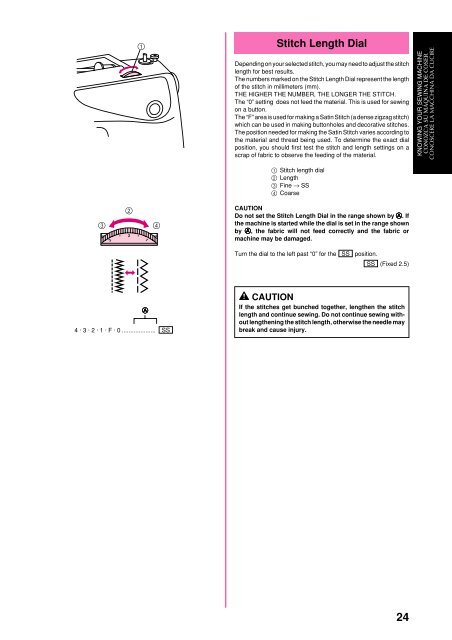
Stitch Length Dial<br />
Depending on your selected stitch, you may need to adjust the stitch<br />
length for best results.<br />
The numbers marked on the Stitch Length Dial represent the length<br />
of the stitch in millimeters (mm).<br />
THE HIGHER THE NUMBER, THE LONGER THE STITCH.<br />
The “0” setting does not feed the material. This is used for sewing<br />
on a button.<br />
The “F” area is used for making a Satin Stitch (a dense zigzag stitch)<br />
which can be used in making buttonholes and decorative stitches.<br />
The position needed for making the Satin Stitch varies according to<br />
the material and thread being used. To determine the exact dial<br />
position, you should first test the stitch and length settings on a<br />
scrap of fabric to observe the feeding of the material.<br />
KNOWING YOUR SEWING MACHINE<br />
CONOZCA SU MÁQUINA DE COSER<br />
CONOSCERE LA MACCHINA DA CUCIRE<br />
1 Stitch length dial<br />
2 Length<br />
3 Fine → SS<br />
4 Coarse<br />
2<br />
3 4<br />
3<br />
2<br />
· ·<br />
1<br />
CAUTION<br />
Do not set the Stitch Length Dial in the range shown by A. If<br />
the machine is started while the dial is set in the range shown<br />
by A, the fabric will not feed correctly and the fabric or<br />
machine may be damaged.<br />
Turn the dial to the left past “0” for the SS position.<br />
SS (Fixed 2.5)<br />
A<br />
4 · 3 · 2 · 1 · F · 0 .................... SS<br />
CAUTION<br />
If the stitches get bunched together, lengthen the stitch<br />
length and continue sewing. Do not continue sewing without<br />
lengthening the stitch length, otherwise the needle may<br />
break and cause injury.<br />
24


