Brother XL-6053/6063 - Guide utilisateur
Brother XL-6053/6063 - Guide utilisateur
Brother XL-6053/6063 - Guide utilisateur
You also want an ePaper? Increase the reach of your titles
YUMPU automatically turns print PDFs into web optimized ePapers that Google loves.
Patchwork<br />
Pattern Stitch Length Stitch Width<br />
(Fagoting Stitch) SS Fixed 5<br />
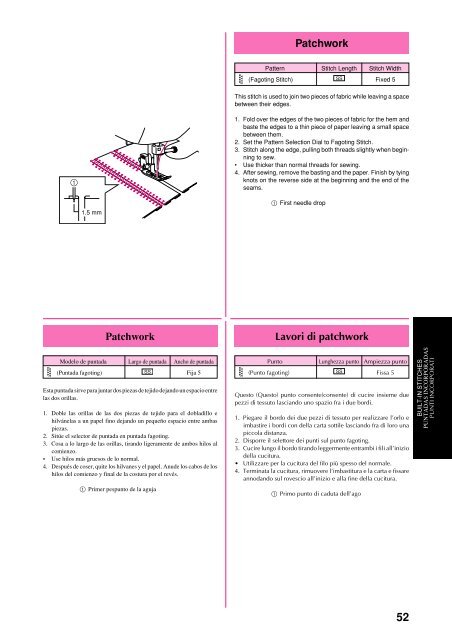
This stitch is used to join two pieces of fabric while leaving a space<br />
between their edges.<br />
1<br />
1. Fold over the edges of the two pieces of fabric for the hem and<br />
baste the edges to a thin piece of paper leaving a small space<br />
between them.<br />
2. Set the Pattern Selection Dial to Fagoting Stitch.<br />
3. Stitch along the edge, pulling both threads slightly when beginning<br />
to sew.<br />
• Use thicker than normal threads for sewing.<br />
4. After sewing, remove the basting and the paper. Finish by tying<br />
knots on the reverse side at the beginning and the end of the<br />
seams.<br />
1.5 mm<br />
1 First needle drop<br />
Patchwork<br />
Lavori di patchwork<br />
Modelo de puntada Largo de puntada Ancho de puntada<br />
(Puntada fagoting) SS Fija 5<br />
Esta puntada sirve para juntar dos piezas de tejido dejando un espacio entre<br />
las dos orillas.<br />
1. Doble las orillas de las dos piezas de tejido para el dobladillo e<br />
hilvánelas a un papel fino dejando un pequeño espacio entre ambas<br />
piezas.<br />
2. Sitúe el selector de puntada en puntada fagoting.<br />
3. Cosa a lo largo de las orillas, tirando ligeramente de ambos hilos al<br />
comienzo.<br />
• Use hilos más gruesos de lo normal.<br />
4. Después de coser, quite los hilvanes y el papel. Anude los cabos de los<br />
hilos del comienzo y final de la costura por el revés.<br />
1 Primer pespunto de la aguja<br />
Punto Lunghezza punto Ampiezza punto<br />
(Punto fagoting) SS Fissa 5<br />
Questo (Questo) punto consente(consente) di cucire insieme due<br />
pezzi di tessuto lasciando uno spazio fra i due bordi.<br />
1. Piegare il bordo dei due pezzi di tessuto per realizzare l’orlo e<br />
imbastire i bordi con della carta sottile lasciando fra di loro una<br />
piccola distanza.<br />
2. Disporre il selettore dei punti sul punto fagoting.<br />
3. Cucire lungo il bordo tirando leggermente entrambi i fili all’inizio<br />
della cucitura.<br />
• Utilizzare per la cucitura del filo più spesso del normale.<br />
4. Terminata la cucitura, rimuovere l’imbastitura e la carta e fissare<br />
annodando sul rovescio all’inizio e alla fine della cucitura.<br />
1 Primo punto di caduta dell’ago<br />
BUILT-IN STITCHES<br />
PUNTADAS INCORPORADAS<br />
PUNTI INCORPORATI<br />
52


