

Brother XL-6053/6063 - Guide utilisateur
Brother XL-6053/6063 - Guide utilisateur
Brother XL-6053/6063 - Guide utilisateur

Create successful ePaper yourself
Turn your PDF publications into a flip-book with our unique Google optimized e-Paper software.
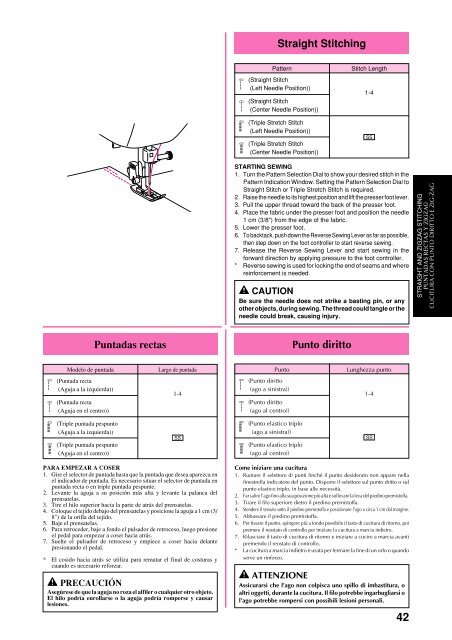
Straight Stitching<br />
Pattern<br />
(Straight Stitch<br />
(Left Needle Position))<br />
(Straight Stitch<br />
(Center Needle Position))<br />
(Triple Stretch Stitch<br />
(Left Needle Position))<br />
(Triple Stretch Stitch<br />
(Center Needle Position))<br />
Stitch Length<br />
1-4<br />
SS<br />
STARTING SEWING<br />
1. Turn the Pattern Selection Dial to show your desired stitch in the<br />
Pattern Indication Window. Setting the Pattern Selection Dial to<br />
Straight Stitch or Triple Stretch Stitch is required.<br />
2. Raise the needle to its highest position and lift the presser foot lever.<br />
3. Pull the upper thread toward the back of the presser foot.<br />
4. Place the fabric under the presser foot and position the needle<br />
1 cm (3/8") from the edge of the fabric.<br />
5. Lower the presser foot.<br />
6. To backtack, push down the Reverse Sewing Lever as far as possible,<br />
then step down on the foot controller to start reverse sewing.<br />
7. Release the Reverse Sewing Lever and start sewing in the<br />
forward direction by applying pressure to the foot controller.<br />
* Reverse sewing is used for locking the end of seams and where<br />
reinforcement is needed.<br />
CAUTION<br />
Be sure the needle does not strike a basting pin, or any<br />
other objects, during sewing. The thread could tangle or the<br />
needle could break, causing injury.<br />
STRAIGHT AND ZIGZAG STITCHING<br />
PUNTADAS RECTAS Y ZIGZAG<br />
CUCITURA CON PUNTO DIRITTO E ZIG-ZAG<br />
Puntadas rectas<br />
Punto diritto<br />
Modelo de puntada<br />
Largo de puntada<br />
Punto<br />
(Punto diritto<br />
(ago a sinistra))<br />
Lunghezza punto<br />
(Puntada recta<br />
(Aguja a la izquierda))<br />
(Puntada recta<br />
(Aguja en el centro))<br />
1-4<br />
(Punto diritto<br />
(ago al centro))<br />
1-4<br />
(Triple puntada pespunto<br />
(Aguja a la izquierda))<br />
(Triple puntada pespunto<br />
(Aguja en el centro))<br />
SS<br />
(Punto elastico triplo<br />
(ago a sinistra))<br />
(Punto elastico triplo<br />
(ago al centro))<br />
SS<br />
PARA EMPEZAR A COSER<br />
1. Gire el selector de puntada hasta que la puntada que desea aparezca en<br />
el indicador de puntada. Es necesario situar el selector de puntada en<br />
puntada recta o en triple puntada pespunte.<br />
2. Levante la aguja a su posición más alta y levante la palanca del<br />
prensatelas.<br />
3. Tire el hilo superior hacia la parte de atrás del prensatelas.<br />
4. Coloque el tejido debajo del prensatelas y posicione la aguja a 1 cm (3/<br />
8") de la orilla del tejido.<br />
5. Baje el prensatelas.<br />
6. Para retroceder, baje a fondo el pulsador de retroceso, luego presione<br />
el pedal para empezar a coser hacia atrás.<br />
7. Suelte el pulsador de retroceso y empiece a coser hacia delante<br />
presionando el pedal.<br />
* El cosido hacia atrás se utiliza para rematar el final de costuras y<br />
cuando es necesario reforzar.<br />
PRECAUCIÓN<br />
Asegúrese de que la aguja no roza el alfiler o cualquier otro objeto.<br />
El hilo podría enrollarse o la aguja podría romperse y causar<br />
lesiones.<br />
Come iniziare una cucitura<br />
1. Ruotare il selettore di punti finché il punto desiderato non appare nella<br />
finestrella indicatore del punto. Disporre il selettore sul punto dritto o sul<br />
punto elastico triplo, in base alle necessità.<br />
2. Far salire l’ago fino alla sua posizione più alta e sollevare la leva del piedino premistoffa.<br />
3. Tirare il filo superiore dietro il piedino premistoffa.<br />
4. Stendere il tessuto sotto il piedino premistoffa e posizionare l’ago a circa 1 cm dal margine.<br />
5. Abbassare il piedino premistoffa.<br />
6. Per fissare il punto, spingere più a fondo possibile il tasto di cucitura di ritorno, poi<br />
premere il reostato di controllo per iniziare la cucitura a marcia indietro.<br />
7. Rilasciare il tasto di cucitura di ritorno e iniziare a cucire a marcia avanti<br />
premendo il reostato di controllo.<br />
* La cucitura a marcia indietro è usata per fermare la fine di un orlo o quando<br />
serve un rinforzo.<br />
ATTENZIONE<br />
Assicurarsi che l’ago non colpisca uno spillo di imbastitura, o<br />
altri oggetti, durante la cucitura. Il filo potrebbe ingarbugliarsi o<br />
l’ago potrebbe rompersi con possibili lesioni personali.<br />
42


