
Create successful ePaper yourself
Turn your PDF publications into a flip-book with our unique Google optimized e-Paper software.
.<br />
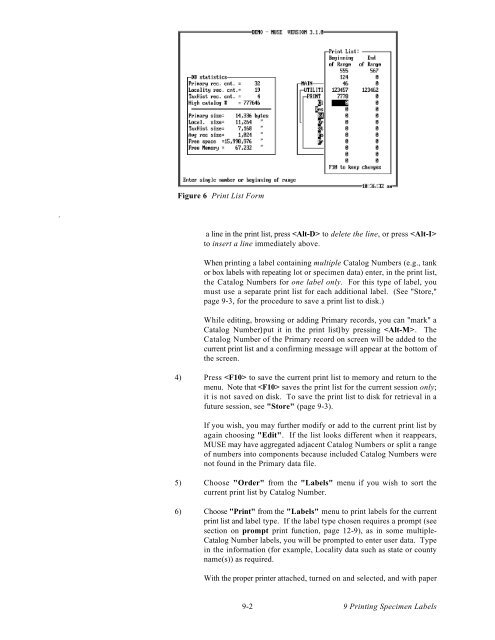
Figure 6 Print List Form<br />
a line in the print list, press to delete the line, or press <br />
to insert a line immediately above.<br />
When printing a label containing multiple Catalog Numbers (e.g., tank<br />
or box labels with repeating lot or specimen data) enter, in the print list,<br />
the Catalog Numbers for one label only. For this type of label, you<br />
must use a separate print list for each additional label. (See "Store,"<br />
page 9-3, for the procedure to save a print list to disk.)<br />
While editing, browsing or adding Primary records, you can "mark" a<br />
Catalog Number)put it in the print list)by pressing . The<br />
Catalog Number of the Primary record on screen will be added to the<br />
current print list and a confirming message will appear at the bottom of<br />
the screen.<br />
4) Press to save the current print list to memory and return to the<br />
menu. Note that saves the print list for the current session only;<br />
it is not saved on disk. To save the print list to disk for retrieval in a<br />
future session, see "Store" (page 9-3).<br />
If you wish, you may further modify or add to the current print list by<br />
again choosing "Edit". If the list looks different when it reappears,<br />
MUSE may have aggregated adjacent Catalog Numbers or split a range<br />
of numbers into components because included Catalog Numbers were<br />
not found in the Primary data file.<br />
5) Choose "Order" from the "Labels" menu if you wish to sort the<br />
current print list by Catalog Number.<br />
6) Choose "Print" from the "Labels" menu to print labels for the current<br />
print list and label type. If the label type chosen requires a prompt (see<br />
section on prompt print function, page 12-9), as in some multiple-<br />
Catalog Number labels, you will be prompted to enter user data. Type<br />
in the information (for example, Locality data such as state or county<br />
name(s)) as required.<br />
With the proper printer attached, turned on and selected, and with paper<br />
9-2<br />
9 Printing Specimen Labels