

5800 Refrigerated Sampler Service Guide - Isco
5800 Refrigerated Sampler Service Guide - Isco
5800 Refrigerated Sampler Service Guide - Isco

You also want an ePaper? Increase the reach of your titles
YUMPU automatically turns print PDFs into web optimized ePapers that Google loves.
<strong>5800</strong> <strong>Refrigerated</strong> <strong>Sampler</strong> <strong>Service</strong> <strong>Guide</strong><br />
Section 2 Sample Delivery System<br />
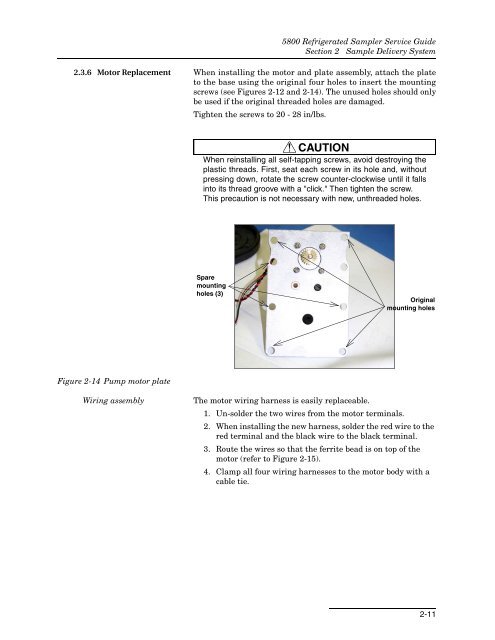
2.3.6 Motor Replacement When installing the motor and plate assembly, attach the plate<br />
to the base using the original four holes to insert the mounting<br />
screws (see Figures 2-12 and 2-14). The unused holes should only<br />
be used if the original threaded holes are damaged.<br />
Tighten the screws to 20 - 28 in/lbs.<br />
CAUTION<br />
When reinstalling all self-tapping screws, avoid destroying the<br />
plastic threads. First, seat each screw in its hole and, without<br />
pressing down, rotate the screw counter-clockwise until it falls<br />
into its thread groove with a "click." Then tighten the screw.<br />
This precaution is not necessary with new, unthreaded holes.<br />
Spare<br />
mounting<br />
holes (3)<br />
Original<br />
mounting holes<br />
Figure 2-14 Pump motor plate<br />
Wiring assembly<br />
The motor wiring harness is easily replaceable.<br />
1. Un-solder the two wires from the motor terminals.<br />
2. When installing the new harness, solder the red wire to the<br />
red terminal and the black wire to the black terminal.<br />
3. Route the wires so that the ferrite bead is on top of the<br />
motor (refer to Figure 2-15).<br />
4. Clamp all four wiring harnesses to the motor body with a<br />
cable tie.<br />
2-11


