

5800 Refrigerated Sampler Service Guide - Isco
5800 Refrigerated Sampler Service Guide - Isco
5800 Refrigerated Sampler Service Guide - Isco

You also want an ePaper? Increase the reach of your titles
YUMPU automatically turns print PDFs into web optimized ePapers that Google loves.
<strong>5800</strong> <strong>Refrigerated</strong> <strong>Sampler</strong> <strong>Service</strong> <strong>Guide</strong><br />
Section 4 CPU and Power Supply<br />
CAUTION<br />
Updating the sampler’s software affects the program settings<br />
and may completely erase the stored data. Record program<br />
settings and collect all data from the sampler before proceeding.<br />
4.4.2 Control Panel Removal<br />
WARNING<br />
Always disconnect the <strong>5800</strong> sampler from AC power before<br />
performing service and repairs.<br />
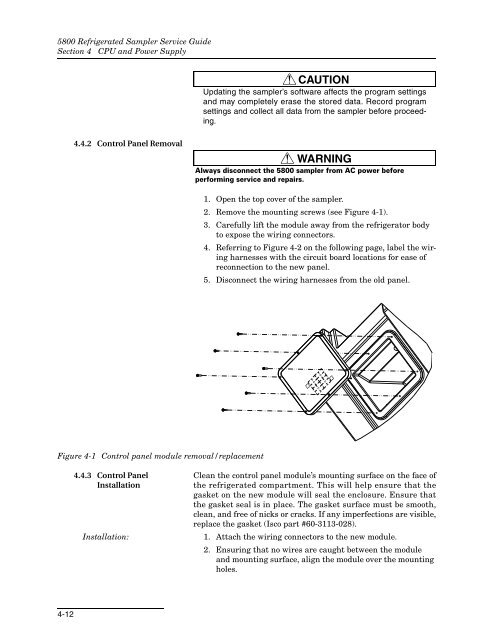
1. Open the top cover of the sampler.<br />
2. Remove the mounting screws (see Figure 4-1).<br />
3. Carefully lift the module away from the refrigerator body<br />
to expose the wiring connectors.<br />
4. Referring to Figure 4-2 on the following page, label the wiring<br />
harnesses with the circuit board locations for ease of<br />
reconnection to the new panel.<br />
5. Disconnect the wiring harnesses from the old panel.<br />
Figure 4-1 Control panel module removal/replacement<br />
4.4.3 Control Panel<br />
Installation<br />
Installation:<br />
Clean the control panel module’s mounting surface on the face of<br />
the refrigerated compartment. This will help ensure that the<br />
gasket on the new module will seal the enclosure. Ensure that<br />
the gasket seal is in place. The gasket surface must be smooth,<br />
clean, and free of nicks or cracks. If any imperfections are visible,<br />
replace the gasket (<strong>Isco</strong> part #60-3113-028).<br />
1. Attach the wiring connectors to the new module.<br />
2. Ensuring that no wires are caught between the module<br />
and mounting surface, align the module over the mounting<br />
holes.<br />
4-12


