Series 04 Ku-Band TVRO Antenna
Series 04 Ku-Band TVRO Antenna
Series 04 Ku-Band TVRO Antenna

Create successful ePaper yourself
Turn your PDF publications into a flip-book with our unique Google optimized e-Paper software.
Troubleshooting and Maintenance<br />
<strong>Series</strong> <strong>04</strong> <strong>Ku</strong>-<strong>Band</strong> <strong>TVRO</strong> <strong>Antenna</strong><br />
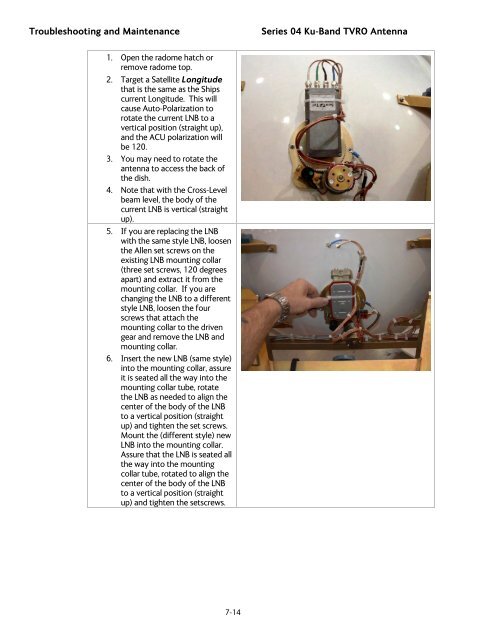
1. Open the radome hatch or<br />
remove radome top.<br />
2. Target a Satellite Longitude<br />
that is the same as the Ships<br />
current Longitude. This will<br />
cause Auto-Polarization to<br />
rotate the current LNB to a<br />
vertical position (straight up),<br />
and the ACU polarization will<br />
be 120.<br />
3. You may need to rotate the<br />
antenna to access the back of<br />
the dish.<br />
4. Note that with the Cross-Level<br />
beam level, the body of the<br />
current LNB is vertical (straight<br />
up).<br />
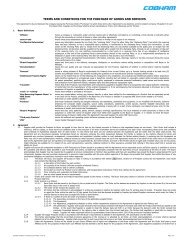
5. If you are replacing the LNB<br />
with the same style LNB, loosen<br />
the Allen set screws on the<br />
existing LNB mounting collar<br />
(three set screws, 120 degrees<br />
apart) and extract it from the<br />
mounting collar. If you are<br />
changing the LNB to a different<br />
style LNB, loosen the four<br />
screws that attach the<br />
mounting collar to the driven<br />
gear and remove the LNB and<br />
mounting collar.<br />
6. Insert the new LNB (same style)<br />
into the mounting collar, assure<br />
it is seated all the way into the<br />
mounting collar tube, rotate<br />
the LNB as needed to align the<br />
center of the body of the LNB<br />
to a vertical position (straight<br />
up) and tighten the set screws.<br />
Mount the (different style) new<br />
LNB into the mounting collar.<br />
Assure that the LNB is seated all<br />
the way into the mounting<br />
collar tube, rotated to align the<br />
center of the body of the LNB<br />
to a vertical position (straight<br />
up) and tighten the setscrews.<br />
7-14
![NC1147 (pdf 1.47 mb) Nitrogen Concentrator [OBIGGS] - Cobham plc](https://img.yumpu.com/51124104/1/190x245/nc1147-pdf-147-mb-nitrogen-concentrator-obiggs-cobham-plc.jpg?quality=85)