User Manual Samsung SRD-470D/470DC DVR
User Manual Samsung SRD-470D/470DC DVR
User Manual Samsung SRD-470D/470DC DVR
You also want an ePaper? Increase the reach of your titles
YUMPU automatically turns print PDFs into web optimized ePapers that Google loves.
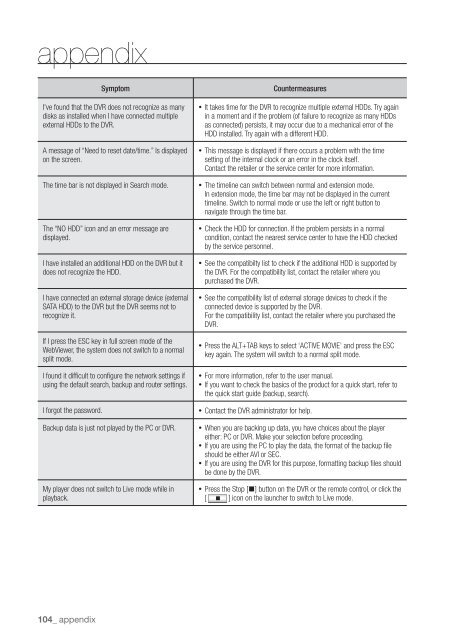
appendixSymptomI've found that the <strong>DVR</strong> does not recognize as manydisks as installed when I have connected multipleexternal HDDs to the <strong>DVR</strong>.A message of “Need to reset date/time.” Is displayedon the screen.The time bar is not displayed in Search mode.The “NO HDD” icon and an error message aredisplayed.I have installed an additional HDD on the <strong>DVR</strong> but itdoes not recognize the HDD.I have connected an external storage device (externalSATA HDD) to the <strong>DVR</strong> but the <strong>DVR</strong> seems not torecognize it.If I press the ESC key in full screen mode of theWebViewer, the system does not switch to a normalsplit mode.I found it difficult to configure the network settings ifusing the default search, backup and router settings.I forgot the password.Backup data is just not played by the PC or <strong>DVR</strong>.My player does not switch to Live mode while inplayback.Countermeasures• It takes time for the <strong>DVR</strong> to recognize multiple external HDDs. Try againin a moment and if the problem (of failure to recognize as many HDDsas connected) persists, it may occur due to a mechanical error of theHDD installed. Try again with a different HDD.• This message is displayed if there occurs a problem with the timesetting of the internal clock or an error in the clock itself.Contact the retailer or the service center for more information.• The timeline can switch between normal and extension mode.In extension mode, the time bar may not be displayed in the currenttimeline. Switch to normal mode or use the left or right button tonavigate through the time bar.• Check the HDD for connection. If the problem persists in a normalcondition, contact the nearest service center to have the HDD checkedby the service personnel.• See the compatibilty list to check if the additional HDD is supported bythe <strong>DVR</strong>. For the compatibility list, contact the retailer where youpurchased the <strong>DVR</strong>.• See the compatibility list of external storage devices to check if theconnected device is supported by the <strong>DVR</strong>.For the compatibility list, contact the retailer where you purchased the<strong>DVR</strong>.• Press the ALT+TAB keys to select ‘ACTIVE MOVIE’ and press the ESCkey again. The system will switch to a normal split mode.• For more information, refer to the user manual.• If you want to check the basics of the product for a quick start, refer tothe quick start guide (backup, search).• Contact the <strong>DVR</strong> administrator for help.• When you are backing up data, you have choices about the playereither: PC or <strong>DVR</strong>. Make your selection before proceeding.• If you are using the PC to play the data, the format of the backup fileshould be either AVI or SEC.• If you are using the <strong>DVR</strong> for this purpose, formatting backup files shouldbe done by the <strong>DVR</strong>.• Press the Stop [@] button on the <strong>DVR</strong> or the remote control, or click the[ ] icon on the launcher to switch to Live mode.104_ appendix


