- Page 1 and 2:
Register your product nowTo keep up
- Page 3 and 4:
ContentsRegister your product now 1
- Page 5 and 6:
1. General presentationDear Custome
- Page 7 and 8:
Precautionary LabelsRead all labels
- Page 9:
1.3 VoltaLab 21 Economical Electroc
- Page 12 and 13:
1.6 VoltaLab 40 Dynamic Electrochem
- Page 14:
1.8 VoltaLab 80 Universal Electroch
- Page 20:
Edit the Other settings parameters.
- Page 23 and 24:
2.5 Uninstalling VoltaMaster 4Volta
- Page 25 and 26:
3. Getting startedFor a VoltaLab 10
- Page 28:
For a VoltaLab 06RS232 cable9-pin f
- Page 31 and 32:
3.3 User identificationIf you selec
- Page 33 and 34:
3.5 Set up your instrumentIf you se
- Page 35 and 36:
3.7 Set up the Other settings param
- Page 37 and 38:
4. VoltaMaster 44.1 The VoltaMaster
- Page 39 and 40:
Curve type bar - XX is the abscissa
- Page 41:
4.2 Using the VoltaMaster 4 Help fi
- Page 45 and 46:
4.3.1 Open Circuit PotentialThe Ope
- Page 47 and 48:
Visual IFVA virtual front panel is
- Page 49 and 50:
4.3.13 Pot. Dynamic EIS (Impedance)
- Page 51 and 52:
4.3.17 Gal. Expert EIS (Impedance)T
- Page 53 and 54:
4.3.22 Pot. Step by step CVStep by
- Page 55 and 56:
4.3.28 Gal. Universal DPThe Gal. Un
- Page 57 and 58:
4.3.34 Pot. Low Current CAA potenti
- Page 59 and 60:
4.3.40 Auto. TrajectThe Auto. Traje
- Page 61 and 62:
4.3.46 Standard calibrationThis met
- Page 63 and 64:
4.3.47 Calibration by additionThis
- Page 65 and 66:
4.3.53 Print ReportThe Print Report
- Page 67 and 68:
The following guidances are given i
- Page 69 and 70:
8. Save the sequenceThe initial dat
- Page 71 and 72:
4.5.1 Before starting a sequenceChe
- Page 73 and 74:
4.6 Processing curves to obtain res
- Page 75 and 76:
4.6.1 Post run processing functions
- Page 77 and 78:
InformationDisplay information on a
- Page 79 and 80:
Evans plotDisplay the Evans diagram
- Page 81 and 82:
4.7 PrintoutsThe Printpreview iconV
- Page 83 and 84:
4.7.3 Preparing a printoutThe “Fi
- Page 85 and 86:
4.7.5 Printing the parameters of an
- Page 87:
4.7.6 Printing CurvesA curve or an
- Page 90 and 91:
1. 20 curves maximun in a graphYou
- Page 92 and 93:
6. Current disjunctionEffectsThe po
- Page 94 and 95:
11. Out of range: -15 V to 15 VWhil
- Page 96 and 97:
17. Vg overloadThis error message i
- Page 98 and 99:
4.9 Troubleshooting list4.9.1 Chara
- Page 100 and 101:
4.10 The ohmic drop compensation4.1
- Page 102 and 103:
4.10.4 Running an experiment with a
- Page 104 and 105:
CGgIPpQRSTZCalibration CV STGal. Un
- Page 106 and 107:
Menu “File” (Routine setup mode
- Page 108 and 109:
Menu “Settings” (Full and Super
- Page 110 and 111:
Menu “File” (Routine setup mode
- Page 112 and 113:
Menu “Settings” (Full and Super
- Page 114 and 115:
5.1.1 The front panelsPGZ100 and PG
- Page 116 and 117:
The “D/A OUT” socket (4)A DC vo
- Page 118 and 119:
5.1.2 The rear panelsLINE FUSE T2A
- Page 120 and 121:
4 connecting cords are used (see th
- Page 122 and 123:
5.1.4 UseThe PGZ and PST potentiost
- Page 124 and 125:
5. Background noise on measurements
- Page 126 and 127:
5.1.7 Technical specificationsPGZ10
- Page 128 and 129:
PGZ301 PotentiostatRegulationCompli
- Page 130 and 131:
PGZ402 Universal PotentiostatRegula
- Page 132 and 133:
PST006 Educational PotentiostatRegu
- Page 134 and 135:
5.1.8 CE MarkingThe PGZ100, PGZ301,
- Page 136 and 137:
the PGP201 internal signal generato
- Page 138 and 139:
5.2.2 The rear panelLI-BATTERY3.6 V
- Page 140 and 141:
5.2.3 InstallationElectrical safety
- Page 142 and 143: 2. Connecting the computerSee Secti
- Page 144 and 145: 3. User data lost - Press any keyTh
- Page 146 and 147: 5.2.6 MaintenanceWarning!All cables
- Page 148 and 149: 5.2.8 CE MarkingThe PGP201 complies
- Page 150 and 151: If the EDI10000 is used:ONE(X) INI
- Page 152 and 153: 3. To set another electrode rotatin
- Page 154 and 155: Cables 1 to 4 are supplied in the C
- Page 156 and 157: 6.3 Rotating Ring and Disc Electrod
- Page 158 and 159: PGZ TwoWORKAUXREFCell ringCell AUXC
- Page 160 and 161: 6.3.5 ConclusionIt is convenient an
- Page 162 and 163: 1 PGZ/PST050 “REF.” socket to t
- Page 164 and 165: 6.5.2 SettingsEstablish the serial
- Page 166 and 167: 166VoltaLab 21/06/10/40/50/80Sectio
- Page 168 and 169: Determine the peak and integrate th
- Page 170 and 171: Determine the peak and integrate th
- Page 172 and 173: 6.6 ABU901 AutoburetteThe ABU901 is
- Page 174 and 175: RS232 cable9-pin female / 9-pin fem
- Page 176 and 177: 6.7.4 Set up your cellIf you run a
- Page 178 and 179: 6.7.8 Technical specifications - HV
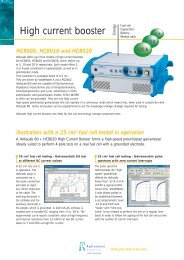
- Page 180 and 181: 6.8 HCB005 - HCB010 - HCB020 High C
- Page 182 and 183: RS232CLINE FUSE T2A L250V120/230 Va
- Page 184 and 185: If it is not the case (communicatio
- Page 186 and 187: 6.8.5 Set up the other settingsSet
- Page 188 and 189: Environmental conditionsInterior us
- Page 190 and 191: 6.9 Additional units - PGZ402 E(X)
- Page 194 and 195: Click the “Settings” button and
- Page 196 and 197: 6.11 External signal generator - Vg
- Page 198 and 199: 6.12 Measuring an A/D IN signalUsin