You also want an ePaper? Increase the reach of your titles
YUMPU automatically turns print PDFs into web optimized ePapers that Google loves.
Chapter 6. Upgrading the Old Database<br />
Task 6 - Change Objects<br />
58<br />
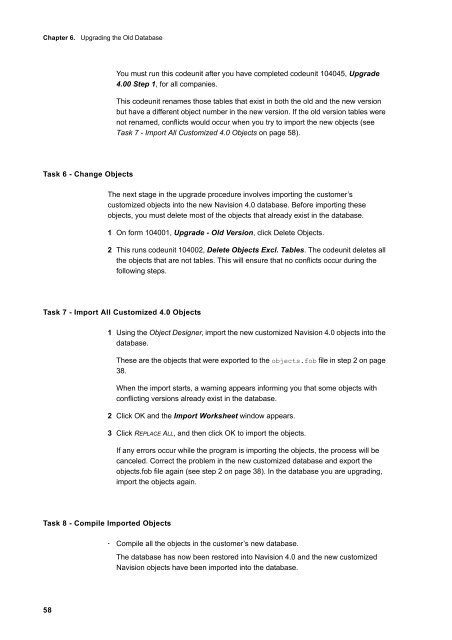
You must run this codeunit after you have completed codeunit 104045, <strong>Upgrade</strong><br />
4.00 Step 1, for all companies.<br />
This codeunit renames those tables that exist in both the old and the new version<br />
but have a different object number in the new version. If the old version tables were<br />
not renamed, conflicts would occur when you try to import the new objects (see<br />
Task 7 - Import All Customized 4.0 Objects on page 58).<br />
The next stage in the upgrade procedure involves importing the customer’s<br />
customized objects into the new Navision 4.0 database. Before importing these<br />
objects, you must delete most of the objects that already exist in the database.<br />
1 On form 104001, <strong>Upgrade</strong> - Old Version, click Delete Objects.<br />
2 This runs codeunit 104002, Delete Objects Excl. Tables. The codeunit deletes all<br />
the objects that are not tables. This will ensure that no conflicts occur during the<br />
following steps.<br />
Task 7 - Import All Customized 4.0 Objects<br />
Task 8 - Compile Imported Objects<br />
1 Using the Object Designer, import the new customized Navision 4.0 objects into the<br />
database.<br />
These are the objects that were exported to the objects.fob file in step 2 on page<br />
38.<br />
When the import starts, a warning appears informing you that some objects with<br />
conflicting versions already exist in the database.<br />
2 Click OK and the Import Worksheet window appears.<br />
3 Click REPLACE ALL, and then click OK to import the objects.<br />
If any errors occur while the program is importing the objects, the process will be<br />
canceled. Correct the problem in the new customized database and export the<br />
objects.fob file again (see step 2 on page 38). In the database you are upgrading,<br />
import the objects again.<br />
· Compile all the objects in the customer’s new database.<br />
The database has now been restored into Navision 4.0 and the new customized<br />
Navision objects have been imported into the database.


