STATA 11 for Windows SAMPLE SESSION - Food Security Group ...
STATA 11 for Windows SAMPLE SESSION - Food Security Group ...
STATA 11 for Windows SAMPLE SESSION - Food Security Group ...

You also want an ePaper? Increase the reach of your titles
YUMPU automatically turns print PDFs into web optimized ePapers that Google loves.
Stata <strong>11</strong> Sample Session Section 1 - Basic functions: Files, Descriptives, Data Trans<strong>for</strong>mations<br />
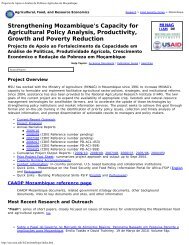
The label values commands<br />
Now that the label has been defined, we can assign this<br />
label to the variable we created with the 4 categories.<br />
8. Click on Data, then<br />
Data utilities then<br />
Label utilities then<br />
Assign value label to variables.<br />
The Label values – Assign value label to a variable<br />
dialog box opens. The default choice is to attach<br />
a value label to variables.<br />
9. In the Variables: box select age_gp.<br />
This is the variable that we want to attach a<br />
label to.<br />
10. In the Value label box, select “age_gp”.<br />
<strong>11</strong>. Click on the copy button, switch to the do-file<br />
editor, paste the command, switch back and click<br />
on the Ok button.<br />
The Stata command is:<br />
label values age_gp age_gp<br />
The steps to label a variable and define value labels has<br />
been made much easier in this version of Stata.<br />
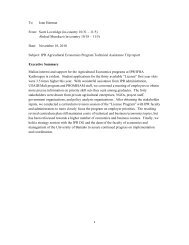
Second method: Another method we can use is to generate the new variable,<br />
assign the new values and assign the labels <strong>for</strong> the values in<br />
one step:<br />
1. Select Create or change variables from the<br />
Data menu<br />
2. Select Other variable trans<strong>for</strong>mation<br />
commands<br />
3. Select Recode categorical variable<br />
4. In the “Main” tab, select ca3 in the Variables box.<br />
5. In the Required box, specify the range you want<br />
and the new value to be assigned as well as the<br />
label <strong>for</strong> that new value, e.g.<br />
(0/10 = 1 “0 to 10")<br />
6. In the Optional boxes continue to specify the ranges<br />
and value to be assigned, e.g.<br />
(10.001/19 = 2 “<strong>11</strong> to 19")<br />
(19.001/60 = 3 “20 to 60")<br />
(60.001/max = 4 “61 and older”)<br />
Note: examples on how to specify the<br />
value can be see if you click on the<br />
“Examples” button.<br />
7. Click on the “Options” tab. Click on the radio<br />
button next to “Generate new variables”.<br />
8. In the box, type the name of the new variable:<br />
45