

FONIX® FP35 Touch - Frye Electronics
FONIX® FP35 Touch - Frye Electronics
FONIX® FP35 Touch - Frye Electronics

Create successful ePaper yourself
Turn your PDF publications into a flip-book with our unique Google optimized e-Paper software.
Coupler Measurements 87<br />
<strong>FP35</strong> software setup<br />
Follow these instructions to configure the <strong>FP35</strong> for telecoil measurements in the<br />
Coupler Multicurve screen.<br />
1. Follow the instructions found in Section 2.5.8 to set up the <strong>FP35</strong> Default<br />
Settings Menu for telecoil measurements.<br />
2. Press F3 from the Opening Screen to enter the Coupler Multicurve screen.<br />
3. Press [MENU] to open the local menu.<br />
4. Use [q, p] to select TELECOIL and use [t, u] to choose ON.<br />
5. Press [EXIT] to close the local menu. The source box at the bottom of the measurement<br />
graph will now indicate TMFS.<br />
6. Follow the instructions in the Telecoil Board Setup or Telewand Setup sections<br />
below, depending upon the device you are using for your telecoil measurements.<br />
Telecoil Board Setup<br />
Follow these instructions for setting up the hearing aid and the <strong>FP35</strong> analyzer for<br />
telecoil measurements using an external telecoil board.<br />
1. Plug the telecoil board into the earphone jack or the speaker jack (new style rear<br />
panel only) on the back of the <strong>FP35</strong> analyzer.<br />
2. Attach the hearing aid to a coupler in the usual way and set the hearing aid to<br />
telecoil mode.<br />
3. Use [p] to select the desired mA/M strength for the telecoil test. This can range<br />
from 1 to 100 mA/M.<br />
4. Use [F4] to choose COMP, DIG SPCH or FAST for the signal type.<br />
5. Press [START/STOP] to begin the measurement. This will show the output of<br />
the telecoil response.<br />
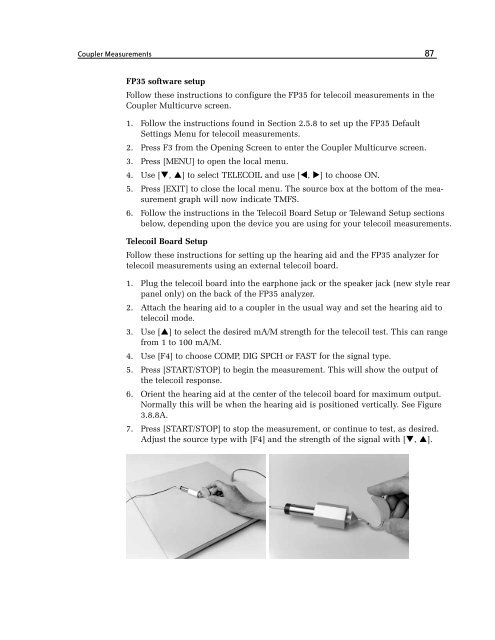
6. Orient the hearing aid at the center of the telecoil board for maximum output.<br />
Normally this will be when the hearing aid is positioned vertically. See Figure<br />
3.8.8A.<br />
7. Press [START/STOP] to stop the measurement, or continue to test, as desired.<br />
Adjust the source type with [F4] and the strength of the signal with [q, p].


