
You also want an ePaper? Increase the reach of your titles
YUMPU automatically turns print PDFs into web optimized ePapers that Google loves.
Basic Controls<br />
This chapter discusses the basic operations that are used to play<br />
the Concert Performer, such as sound selection, Part configuration<br />
and effect settings.<br />
Selecting a Part to Play<br />
When the CP’s main play screen is displayed (For example, when the CP is first turned on), you are<br />
presented with four sound Parts that can be played from the keyboard. These four Parts are named<br />
LEFT/SPLIT, RIGHT 1, RIGHT 2, and SOLO, and each one has an instrument sound assigned to it.<br />
You can selectively turn on/off any combination of these four Parts, allowing you to have up to four<br />
different sounds at the same time across the keyboard.<br />
Sounds assigned to Parts RIGHT 1, RIGHT 2 and SOLO will be layered on top of each other when all<br />
three Parts are active at the same time. Activating the LEFT/SPLIT Part automatically splits the<br />
keyboard so that only the sound that is assigned to the LEFT/SPLIT Part is heard when you play in<br />
the lower octave keys. Each Part has a dedicated button on the front panel that selects and turns<br />
on/off that Part. You can Also select a Part by pressing the appropriate L or R button.<br />
Selecting a Part is easy:<br />
1) Press the PART button for the Part you wish to activate. The PART button LED will light.<br />
2) Press the PART button again to turn that Part off.<br />
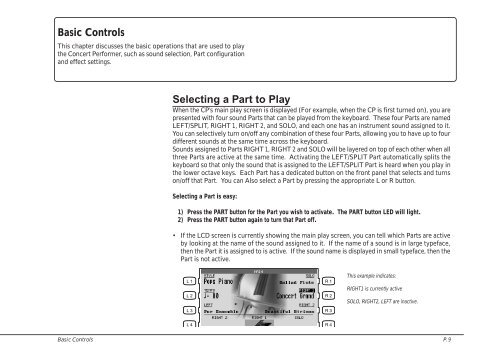
• If the LCD screen is currently showing the main play screen, you can tell which Parts are active<br />
by looking at the name of the sound assigned to it. If the name of a sound is in large typeface,<br />
then the Part it is assigned to is active. If the sound name is displayed in small typeface, then the<br />
Part is not active.<br />
L 1<br />
L 2<br />
L 3<br />
R 1<br />
R 2<br />
R 3<br />
This example indicates:<br />
RIGHT1 is currently active<br />
SOLO, RIGHT2, LEFT are inactive.<br />
L 4<br />
R 4<br />
Basic Controls P. 9