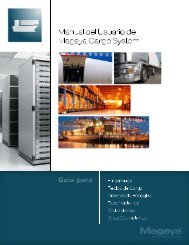
Magaya Software Accounting Manual
Magaya Software Accounting Manual
Magaya Software Accounting Manual
You also want an ePaper? Increase the reach of your titles
YUMPU automatically turns print PDFs into web optimized ePapers that Google loves.
ADD ITEMS AND SERVICES<br />
• Other Freight: Use for items (or services) that relate to freight but<br />
are not actual freight such as Fuel Surcharge cost and income.<br />
• Inventory: Use this for items that you keep in your inventory and<br />
sell. If you select “Inventory” then the “Assets Account” and “Inventory<br />
Item” dropdowns will be available.<br />
3) For the “Tax Code” field, select a sales tax to apply to the item or service.<br />
(To set up the sales tax, go to Chart of Accounts, Actions button, Tax<br />
Table.)<br />
4) Enter a description of the item. The “Code” field will fill in automatically<br />
based on the description.<br />
5) Select an account the item (or service) will refer to in the general ledger<br />
(select the account you want when you run your income statement to see<br />
this item reflected in, depending on how detailed you want your income<br />
statement to be). The item (or service) will be income, expense or cost of<br />
goods sold depending on what account it is related to. For example a<br />
storage fee is assigned to a Cost of Services account. Ground Freight<br />
Income is assigned to a Ground Freight Income account.<br />
6) Enter a price. If you want to have the price calculated, use the “Tariff”<br />
button. For details on using the Tariff dialog box, see Chapter 2 in the<br />
<strong>Magaya</strong> <strong>Software</strong> Customization <strong>Manual</strong>.<br />
7) If you check the box to indicate this is a resale item, the fields below the<br />
checkbox will become available:<br />
• The checkbox “Create related resale item automatically” is used if<br />
you want your <strong>Magaya</strong> system to automatically create a resale item<br />
when either a manual expense or income charge is created.<br />
• Income Item (or Expense Item): If you selected an Income Account,<br />
then this field will be “Income Item”.<br />
• Preferred Vendor: This may be grayed out.<br />
• Assets Account: For purchasing inventory and reselling it. (This will<br />
be activated when you select the Type as “Inventory”).<br />
• Inventory Item: Select from the items in the dropdown or add a new<br />
item. (This will be activated when you select the Type as “Inventory”).<br />
This pulls from information from the Inventory Item Definitions<br />
that are located in the Warehousing folder.<br />
8) Click the OK button when done. The item (or service) now appears in the<br />
list.<br />
27


