Atomic Weapons Research Establishment. Orford ... - English Heritage
Atomic Weapons Research Establishment. Orford ... - English Heritage
Atomic Weapons Research Establishment. Orford ... - English Heritage

Create successful ePaper yourself
Turn your PDF publications into a flip-book with our unique Google optimized e-Paper software.
suppressant, and within the roof structure are the remains of large air conditioning ducts.<br />
On the northern side of the south eastern entrance passage are two rooms that<br />
probably accommodated switch and monitoring equipment, and on the south side of the<br />
south west entrance passage was a staff room and toilet cubicles. Testing required the<br />
building to be temperature and humidity controlled and on the northwest side of the<br />
mound is a large self-contained reinforced concrete, two bay plant room measuring 21m<br />
(69ft) by 3.89m (12ft 8in). This sits within the main shingle traverse and is insulated from<br />
it by a surrounding brick wall that acts a damp course. Air conditioning ducts from the<br />
main chamber enter this building and surviving plant within it indicates that it housed air<br />
conditioning plant. On the north side of the traverse is a similar self-contained structure;<br />
surviving fittings show that it mainly housed electrical switch gear, controls for the<br />
vibrating machines and carbon-dioxide supplies for the fire suppressant system. To the<br />
northwest of Laboratory 1 F3/123 is a detached rectangular reinforced concrete building,<br />
10.92m (35ft 10in) by 6.1m (20ft). It was formerly numbered 127 and its last function<br />
was described as a Laboratory Store. Later alterations to this building, include the<br />
bricking up of the entrance on its southwest side and the replacement of wide opening<br />
with a single door, at this time a window was probably also blocked on the northwest<br />
side. Internally, a breeze block wall was inserted. These alterations may point to a<br />
change in the building’s function.<br />
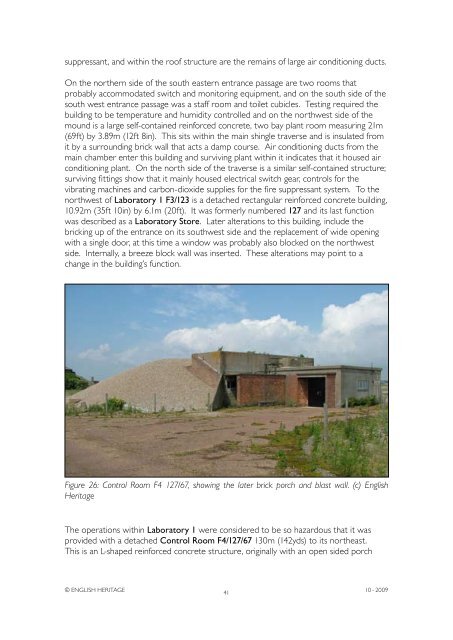
Figure 26: Control Room F4 127/67, showing the later brick porch and blast wall. (c) <strong>English</strong><br />
<strong>Heritage</strong><br />
The operations within Laboratory 1 were considered to be so hazardous that it was<br />
provided with a detached Control Room F4/127/67 130m (142yds) to its northeast.<br />
This is an L-shaped reinforced concrete structure, originally with an open sided porch<br />
© ENGLISH HERITAGE<br />
41<br />
10 - 2009