fortigate-ipsec-40-mr3
fortigate-ipsec-40-mr3
fortigate-ipsec-40-mr3

Create successful ePaper yourself
Turn your PDF publications into a flip-book with our unique Google optimized e-Paper software.
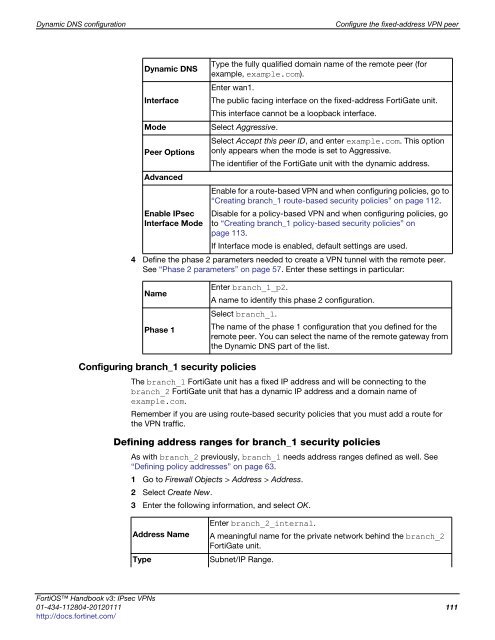
Dynamic DNS configuration Configure the fixed-address VPN peer<br />
Dynamic DNS<br />
4 Define the phase 2 parameters needed to create a VPN tunnel with the remote peer.<br />
See “Phase 2 parameters” on page 57. Enter these settings in particular:<br />
Configuring branch_1 security policies<br />
Type the fully qualified domain name of the remote peer (for<br />
example, example.com).<br />
Enter wan1.<br />
Interface The public facing interface on the fixed-address FortiGate unit.<br />
This interface cannot be a loopback interface.<br />
Mode Select Aggressive.<br />
Peer Options<br />
Advanced<br />
Enable IPsec<br />
Interface Mode<br />
Name<br />
Phase 1<br />
Select Accept this peer ID, and enter example.com. This option<br />
only appears when the mode is set to Aggressive.<br />
The identifier of the FortiGate unit with the dynamic address.<br />
Enable for a route-based VPN and when configuring policies, go to<br />
“Creating branch_1 route-based security policies” on page 112.<br />
Disable for a policy-based VPN and when configuring policies, go<br />
to “Creating branch_1 policy-based security policies” on<br />
page 113.<br />
If Interface mode is enabled, default settings are used.<br />
Enter branch_1_p2.<br />
A name to identify this phase 2 configuration.<br />
Select branch_1.<br />
The name of the phase 1 configuration that you defined for the<br />
remote peer. You can select the name of the remote gateway from<br />
the Dynamic DNS part of the list.<br />
The branch_1 FortiGate unit has a fixed IP address and will be connecting to the<br />
branch_2 FortiGate unit that has a dynamic IP address and a domain name of<br />
example.com.<br />
Remember if you are using route-based security policies that you must add a route for<br />
the VPN traffic.<br />
Defining address ranges for branch_1 security policies<br />
As with branch_2 previously, branch_1 needs address ranges defined as well. See<br />
“Defining policy addresses” on page 63.<br />
1 Go to Firewall Objects > Address > Address.<br />
2 Select Create New.<br />
3 Enter the following information, and select OK.<br />
Enter branch_2_internal.<br />
Address Name A meaningful name for the private network behind the branch_2<br />
FortiGate unit.<br />
Type Subnet/IP Range.<br />
FortiOS Handbook v3: IPsec VPNs<br />
01-434-112804-20120111 111<br />
http://docs.fortinet.com/