fortigate-ipsec-40-mr3
fortigate-ipsec-40-mr3
fortigate-ipsec-40-mr3
Create successful ePaper yourself
Turn your PDF publications into a flip-book with our unique Google optimized e-Paper software.
Protecting OSPF with IPsec OSPF over IPsec configuration<br />
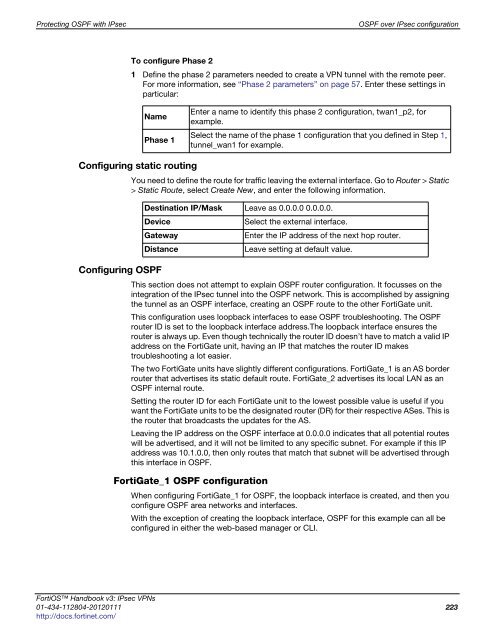
To configure Phase 2<br />
1 Define the phase 2 parameters needed to create a VPN tunnel with the remote peer.<br />
For more information, see “Phase 2 parameters” on page 57. Enter these settings in<br />
particular:<br />
Name<br />
Phase 1<br />
Configuring static routing<br />
Configuring OSPF<br />
Enter a name to identify this phase 2 configuration, twan1_p2, for<br />
example.<br />
Select the name of the phase 1 configuration that you defined in Step 1,<br />
tunnel_wan1 for example.<br />
You need to define the route for traffic leaving the external interface. Go to Router > Static<br />
> Static Route, select Create New, and enter the following information.<br />
Destination IP/Mask Leave as 0.0.0.0 0.0.0.0.<br />
Device Select the external interface.<br />
Gateway Enter the IP address of the next hop router.<br />
Distance Leave setting at default value.<br />
This section does not attempt to explain OSPF router configuration. It focusses on the<br />
integration of the IPsec tunnel into the OSPF network. This is accomplished by assigning<br />
the tunnel as an OSPF interface, creating an OSPF route to the other FortiGate unit.<br />
This configuration uses loopback interfaces to ease OSPF troubleshooting. The OSPF<br />
router ID is set to the loopback interface address.The loopback interface ensures the<br />
router is always up. Even though technically the router ID doesn’t have to match a valid IP<br />
address on the FortiGate unit, having an IP that matches the router ID makes<br />
troubleshooting a lot easier.<br />
The two FortiGate units have slightly different configurations. FortiGate_1 is an AS border<br />
router that advertises its static default route. FortiGate_2 advertises its local LAN as an<br />
OSPF internal route.<br />
Setting the router ID for each FortiGate unit to the lowest possible value is useful if you<br />
want the FortiGate units to be the designated router (DR) for their respective ASes. This is<br />
the router that broadcasts the updates for the AS.<br />
Leaving the IP address on the OSPF interface at 0.0.0.0 indicates that all potential routes<br />
will be advertised, and it will not be limited to any specific subnet. For example if this IP<br />
address was 10.1.0.0, then only routes that match that subnet will be advertised through<br />
this interface in OSPF.<br />
FortiGate_1 OSPF configuration<br />
When configuring FortiGate_1 for OSPF, the loopback interface is created, and then you<br />
configure OSPF area networks and interfaces.<br />
With the exception of creating the loopback interface, OSPF for this example can all be<br />
configured in either the web-based manager or CLI.<br />
FortiOS Handbook v3: IPsec VPNs<br />
01-434-112804-20120111 223<br />
http://docs.fortinet.com/


