Manuale italiano-inglese Oberheim-Viscount MC3000 - Synth Zone
Manuale italiano-inglese Oberheim-Viscount MC3000 - Synth Zone
Manuale italiano-inglese Oberheim-Viscount MC3000 - Synth Zone

You also want an ePaper? Increase the reach of your titles
YUMPU automatically turns print PDFs into web optimized ePapers that Google loves.
MC 3000<br />
Operating Manual<br />
Bear in mind that the MIDI FILTER settings affect the data processed by the instrument<br />
(control channel and IN/OUT redirection of the patch-bay) while they have no effect on<br />
the MIDI THRU ports.<br />
6.2.4 MIDI PROGRAM MAP (MAP)<br />
The MIDI PROGRAM MAP is accessed from the previous page or from any other page of<br />
the COMMON section by pressing F3, in line with the icon rectangle marked MAP. As in<br />
all the other pages, the top of the page displays the operating mode, the page and the<br />
current section, while the bottom carries the icons associated to the various pages of the<br />
section, with the icon of the current page highlighted by reverse lighting.<br />
This page enables the user to create a personalized map where he can set the order of<br />
the patches which can be recalled by a remote unit with consecutive program change<br />
numbers. In other words, the user can make settings which mean that program change n.<br />
1 does not necessarily correspond to patch n. 1 of selected bank, program change n. 2<br />
does not correspond to patch n. 2, and so on. For example, the user may have program<br />
change n.1 correspond to patch 13 of bank D and n. 2 correspond to patch 3 of bank H,<br />
and so on. This function is useful when the remote unit is unable to send the bank<br />
change message, and so using only program changes from 0 to 127, the user is forced to<br />
use only the first 128 patches (0-127), of bank selected only.<br />
Moving the cursor keys to the STATUS field in the top right-hand corner of the display, the<br />
user can use the encoder or the INC and DEC keys to set the DISABLED status which<br />
disables the personalized map of the program changes, or the MIDI PROGRAM MAP. In<br />
this case, the program changes are received in the normal way and if the remote unit is<br />
not capable of sending the bank change messages, the user will only be able to change<br />
the patches of bank selected. If the user sets ENABLED in the STATUS field using the<br />
INC and DEC keys or the encoder, the MIDI PROGRAM MAP will be enabled and each<br />
program change number sent by the remote unit will correspond to a specific patch set<br />
personally by the user and belonging to any bank he requires.<br />
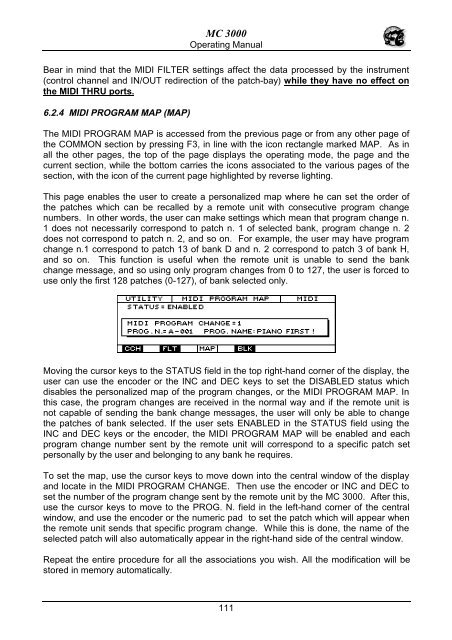
To set the map, use the cursor keys to move down into the central window of the display<br />
and locate in the MIDI PROGRAM CHANGE. Then use the encoder or INC and DEC to<br />
set the number of the program change sent by the remote unit by the MC 3000. After this,<br />
use the cursor keys to move to the PROG. N. field in the left-hand corner of the central<br />
window, and use the encoder or the numeric pad to set the patch which will appear when<br />
the remote unit sends that specific program change. While this is done, the name of the<br />
selected patch will also automatically appear in the right-hand side of the central window.<br />
Repeat the entire procedure for all the associations you wish. All the modification will be<br />
stored in memory automatically.<br />
111