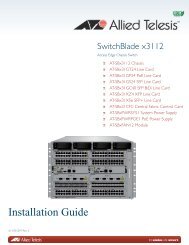
SwitchBlade x3112 Installation Guide - Allied Telesis
SwitchBlade x3112 Installation Guide - Allied Telesis
SwitchBlade x3112 Installation Guide - Allied Telesis
Create successful ePaper yourself
Turn your PDF publications into a flip-book with our unique Google optimized e-Paper software.
P<br />
O<br />
E<br />
0<br />
2<br />
4<br />
6<br />
8<br />
10<br />
P<br />
O<br />
E<br />
S<br />
Y<br />
S<br />
T<br />
E<br />
M<br />
1<br />
S<br />
Y<br />
S<br />
T<br />
E<br />
M<br />
3<br />
POWER<br />
5<br />
7<br />
ESD<br />
9<br />
11<br />
Chapter 2: <strong>Installation</strong><br />
Installing the AT-<br />
SB<strong>x3112</strong> Chassis<br />
in Equipment<br />
Rack<br />
To install the AT-SB<strong>x3112</strong> Chassis into the equipment rack, perform the<br />
following procedure:<br />
Note<br />
Leave the diagonal shipping brace in place until you securely mount<br />
the AT-SB<strong>x3112</strong> Chassis in the rack. This plate is temporary and<br />
prevents any twisting of the chassis frame and mechanical<br />
misalignment of the line card slots during shipping and installation.<br />
1. While facing the front of the chassis, tilt the top of the chassis toward<br />
you as displayed in Figure 31.<br />
2. Lift the AT-SB<strong>x3112</strong> Chassis into the equipment rack and set the<br />
bottom of the rack mount brackets firmly on both previously installed<br />
rack mount screws. See “Preparing the Equipment Rack” on page 55<br />
SBx31FAN<br />
1793<br />
Figure 31. Lifting AT-SB<strong>x3112</strong> Chassis into Place<br />
60


![AT-8100L/8POE-E [Rev B] - Allied Telesis](https://img.yumpu.com/25714603/1/190x245/at-8100l-8poe-e-rev-b-allied-telesis.jpg?quality=85)
