

SwitchBlade x3112 Installation Guide - Allied Telesis
SwitchBlade x3112 Installation Guide - Allied Telesis
SwitchBlade x3112 Installation Guide - Allied Telesis

Create successful ePaper yourself
Turn your PDF publications into a flip-book with our unique Google optimized e-Paper software.
S<br />
Y<br />
S<br />
T<br />
E<br />
M<br />
AC<br />
DC<br />
FAULT<br />
ESD<br />
SYSTEM<br />
POWER<br />
1<br />
3<br />
S<br />
Y<br />
S<br />
T<br />
E<br />
M<br />
5<br />
POWER<br />
7<br />
9<br />
11<br />
SBx3161<br />
SBx31FAN<br />
Chapter 2: <strong>Installation</strong><br />
Replacing the AT-SBx31FAN Tray<br />
The AT-SBx31FAN Tray can only be replaced in the vertical chassis slot<br />
located on the right side of the AT-SB<strong>x3112</strong> Chassis.<br />
Note<br />
Before replacing the fan, it is recommended that you disable the AT-<br />
SBx31FAN Tray in the Switchblade <strong>x3112</strong> Management Software.<br />
This will stop the fan alarms from being sent to network<br />
administrators during the replacement period.<br />
Caution<br />
The AT-SBx31FAN Tray contains active electronic devices, which<br />
can be damaged by electro-static discharges (ESD). Follow the<br />
procedure given in “Protection Against Electrostatic Discharge<br />
(ESD)” on page 64 to guard against ESD damage when unpacking<br />
and installing this line card.<br />
Caution<br />
Each of the line cards require that air actively flows across the<br />
electronic circuits for proper operation. Ensure that the fan tray is<br />
installed before powering any line cards.<br />
Perform the following procedure to replace the AT-SBx31FAN Tray:<br />
<br />
<br />
Removing the existing AT-SBx31FAN Tray from the chassis.<br />
Installing a new AT-SBx31FAN Tray in the chassis.<br />
Removing the<br />
Existing AT-<br />
SBx31FAN Tray<br />
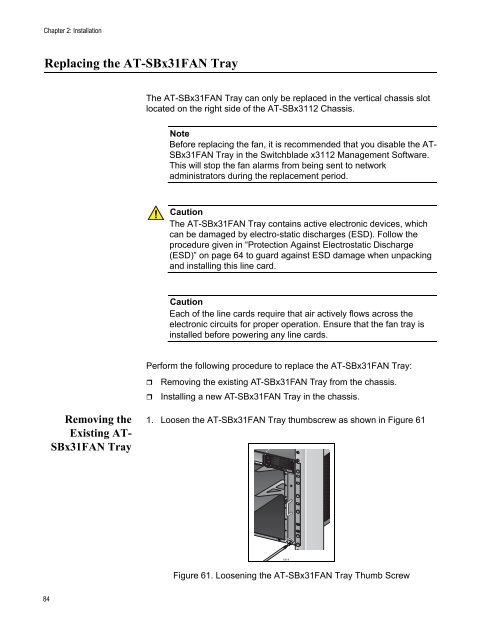
1. Loosen the AT-SBx31FAN Tray thumbscrew as shown in Figure 61<br />
1814<br />
Figure 61. Loosening the AT-SBx31FAN Tray Thumb Screw<br />
84


![AT-8100L/8POE-E [Rev B] - Allied Telesis](https://img.yumpu.com/25714603/1/190x245/at-8100l-8poe-e-rev-b-allied-telesis.jpg?quality=85)


