

SwitchBlade x3112 Installation Guide - Allied Telesis
SwitchBlade x3112 Installation Guide - Allied Telesis
SwitchBlade x3112 Installation Guide - Allied Telesis

You also want an ePaper? Increase the reach of your titles
YUMPU automatically turns print PDFs into web optimized ePapers that Google loves.
<strong>SwitchBlade</strong> <strong>x3112</strong> <strong>Installation</strong> <strong>Guide</strong><br />
Installing SFP Transceivers<br />
<br />
<br />
<br />
<br />
Review the following guidelines before installing an SFP transceiver in<br />
the switch:<br />
A transceiver can be hot-swapped. The switch can be powered on<br />
when you install a transceiver.<br />
Install the transceiver before connecting its network cable.<br />
Fiber optic transceivers are dust sensitive. When a fiber optic cable is<br />
not installed, or when you store the transceiver, always keep the<br />
protective cover in the optical bores. When you do remove this cover,<br />
keep it for future use.<br />
Unnecessary removal or insertion of a transceiver can lead to<br />
premature failure.<br />
Warning<br />
A transceiver can be damaged by static electricity. Be sure to<br />
observe all standard electrostatic discharge (ESD) precautions,<br />
such as wearing an antistatic wrist strap, to avoid damaging the<br />
device.<br />
To install an SFP transceiver in the your switch, perform the following<br />
procedure:<br />
1. Remove the transceiver from its shipping container and store the<br />
packaging material in a safe location.<br />
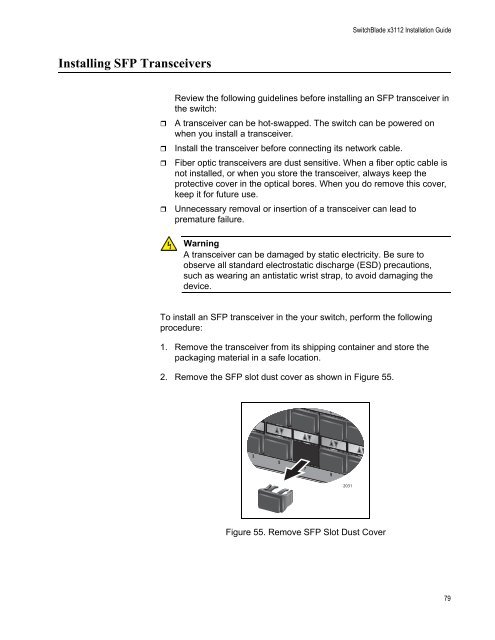
2. Remove the SFP slot dust cover as shown in Figure 55.<br />
1000 LINK<br />
8 10<br />
3 5 7 9 11<br />
2031<br />
Figure 55. Remove SFP Slot Dust Cover<br />
79


![AT-8100L/8POE-E [Rev B] - Allied Telesis](https://img.yumpu.com/25714603/1/190x245/at-8100l-8poe-e-rev-b-allied-telesis.jpg?quality=85)


