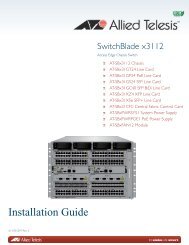
SwitchBlade x3112 Installation Guide - Allied Telesis
SwitchBlade x3112 Installation Guide - Allied Telesis
SwitchBlade x3112 Installation Guide - Allied Telesis
Create successful ePaper yourself
Turn your PDF publications into a flip-book with our unique Google optimized e-Paper software.
POWER<br />
<strong>SwitchBlade</strong> <strong>x3112</strong> <strong>Installation</strong> <strong>Guide</strong><br />
6. Align and insert the AT-SBx3161 power supply into the slot you have<br />
chosen. Figure 41 on page 67 shows the power supply installed in<br />
slot D.<br />
Caution<br />
The AT-SBx3161 System Power Supply is designed to be installed<br />
in either slot C or slot D only. If you inadvertently install this power<br />
supply in slot A or B, it will not function due to an electronic key that<br />
does not allow the power supply to turn on when installed in these<br />
slots.<br />
S<br />
Y<br />
S<br />
T<br />
E<br />
M<br />
S<br />
Y<br />
S<br />
T<br />
E<br />
M<br />
AC<br />
DC<br />
SBx31FAN<br />
FAULT<br />
SYSTEM<br />
POWER<br />
SBx3161<br />
1<br />
3<br />
1846<br />
Figure 41. Inserting the AT-SBx3161 System Power Supply<br />
7. Move the power supply locking handle to the locked or down position<br />
to secure the power supply in the chassis.<br />
S<br />
Y<br />
S<br />
T<br />
E<br />
M<br />
AC<br />
DC<br />
FAULT<br />
S<br />
Y<br />
S<br />
T<br />
E<br />
M<br />
SYSTEM<br />
POWER<br />
SBx3161<br />
SBx31FAN<br />
1<br />
1847<br />
Figure 42. Lock the Handle on the AT-SBx3161 System Power Supply<br />
67


![AT-8100L/8POE-E [Rev B] - Allied Telesis](https://img.yumpu.com/25714603/1/190x245/at-8100l-8poe-e-rev-b-allied-telesis.jpg?quality=85)
