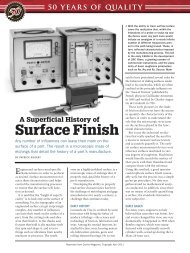
Accusetter Manual - BC MacDonald & Co.
Accusetter Manual - BC MacDonald & Co.
Accusetter Manual - BC MacDonald & Co.

Create successful ePaper yourself
Turn your PDF publications into a flip-book with our unique Google optimized e-Paper software.
1.4 Quick Start Guide<br />
The following steps must be taken to prepare the <strong>Accusetter</strong> II for operation.<br />
1) Unpack and setup the unit.<br />
• Rotate the front foot 90° from its shipping position.<br />
• For air gaging applications, rotate the rear foot 180° from its shipping position and<br />
install the filter regulator assembly. <strong>Co</strong>nnect 60 psi min supply air to the filter<br />
regulator assembly<br />
Note: See "Basic Operations, Unpacking & Setup" for additional information, page 3-1<br />
2) Setup and install the signal conditioning module if it was not installed before<br />
shipment and connect the gage tooling.<br />
Power to the column must be turned off prior to installing or removing a signal<br />
conditioning module.<br />
• Check that the jumpers and switches on the LVDT or A/E signal conditioning board<br />
to be used are properly setup for the application to be run.<br />
• Install the signal conditioning module into the lower bay and secure with the two<br />
thumb screws on the front panel.<br />
• Plug in the LVDT(s) or airline from the gaging fixture to the signal conditioning<br />
module.<br />
Note: See the "Advanced Operation, Module Setup" section for additional information,<br />
page 4-1.<br />
3) Program <strong>Accusetter</strong> II for the application.<br />
• Plug the power cord into the rear of the unit and to a 100 VAC to 240 VAC 50/60 Hz<br />
power supply. Turn the unit on using the on/off switch on the rear of the unit.<br />
• Using the programming keys and the enter button program the variables such as<br />
range, scale, and limits for the application.<br />
Note: See the "Basic Operation, Programming" for additional information, page 3-7<br />
4) Set up magnification and zero for the air inputs.<br />
• Using the masters for the gage tooling and the mag and zero adjustments on the signal<br />
conditioning module setup the air input(s).<br />
Note: See "Basic Operation, Input Setup" for additional information, page 3-40<br />
5) Master the gage using Calibration mode.<br />
Note: See "Basic Operation, Calibration" for additional information, page 3-43<br />
6) Select Run mode and the unit is ready for gaging.<br />
1-6