PC3000 Complete Installation guide iss 12 - Elektro-Trading
PC3000 Complete Installation guide iss 12 - Elektro-Trading
PC3000 Complete Installation guide iss 12 - Elektro-Trading

You also want an ePaper? Increase the reach of your titles
YUMPU automatically turns print PDFs into web optimized ePapers that Google loves.
General form/module identification<br />
F C 1 2<br />
3 4 5 6<br />
7 8 9 10<br />
11 <strong>12</strong> 13 14<br />
1<br />
2<br />
3<br />
4<br />
5<br />
6<br />
7<br />
8<br />
9<br />
10<br />
11<br />
<strong>12</strong><br />
13<br />
14<br />
15<br />
Cleaning<br />
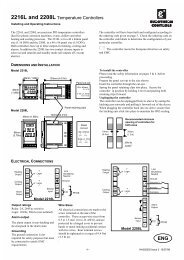
<strong>PC3000</strong> <strong>Installation</strong> Guide<br />
PRODUCTCODE<br />
SERIAL NUMBER<br />
Faraday Close, Durrington, Worthing<br />
West Sussex BN13 3PL<br />
Tel (01903) 268500<br />
I/O Module Types<br />
Module Identification Label eg. RL<strong>12</strong><br />
Product Code Identifies Type<br />
Righthand Top Cover<br />
<strong>12</strong> Polarisation Peg Positions<br />
Connector/Fascia Assembly<br />
Cable Tie Location<br />
Status Indicator Numbers<br />
Isopropyl alcohol may be used to clean the labels, do not use water or water based<br />
products or they will become illegible.<br />
A mild soap solution may be used to clean the exterior surfaces or this product.<br />
Removing the plastic PCB covers<br />
In order to set a channel’s configuration, the top and bottom plastic pcb covers must<br />
be removed:<br />
Caution<br />
The module contains static sensitive components and care must be<br />
taken to ensure that the surface onto which the printed circuit board<br />
assemblies are to be placed and the user are at the same potential.<br />
Standard anti-static precautions should be observed.<br />
8-1