OP-755 Part 2 Pages 197-401 - Personal Page of GENE SLOVER
OP-755 Part 2 Pages 197-401 - Personal Page of GENE SLOVER
OP-755 Part 2 Pages 197-401 - Personal Page of GENE SLOVER
You also want an ePaper? Increase the reach of your titles
YUMPU automatically turns print PDFs into web optimized ePapers that Google loves.
303<br />
started. The starting handle is to be held in the Ilstartll<br />
position, and the car isto be hoisted slowly until it contacts<br />
the upper buffer. The car will b~ stopped by the buffer, but<br />
the starting valve held in the start position prevents venting<br />
the main circuit lines. The pressure reading shown on<br />
the gauge indicates the setting <strong>of</strong> the relief valve. The relief<br />
valve is to be adjusted to crack at 2100 P.S. I., by removing<br />
cap 274311-2, loosening lock nut 2743:J.9- 3, and screwing<br />
Ilin" or Iloutll on the adjusting screw 274324-5. Screwing<br />
"in" onvth e adjusting screw will increase the pressure. An<br />
approximately correct setting <strong>of</strong> the relief valve will be obtained<br />
by screwing in the adjusting screw as far as possible,<br />
and then "back-outll 1-1/2 turns.<br />
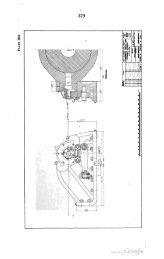
85. Brake adjus tmen ts. - Refer drawing number 274249.<br />
The brake is adjustable to provide for wear, at the brake band<br />
end 274318-3, and at the four eccentric stop pins 274307-2,<br />
and -t.he two adjusting stop screws 274J28~10. ;A maximumdimension<br />
<strong>of</strong> three inches', and a minimumdimension <strong>of</strong> 2-3/4 inches<br />
locating the end <strong>of</strong> the brake cylinder piston 2'74318-1 from<br />
the face <strong>of</strong> ,the .cylinder cap 274317-2 is shownon the drawing.<br />
The brake is to be adjusted to the three inch dimension, this<br />
will provide 1/4, inch <strong>of</strong> piston travel to provide for wear before<br />
it becomes necessary to readjust the brake.<br />
CAUTION:.The distance from the end <strong>of</strong> the brake cylinder piston<br />
to the cylinder cap should never be allowed to become less<br />
th~n 2-3/4 inches. This should be checked at frequent interval§.<br />
",'<br />
With the hoist in the "Stopped" position (brake applied) and<br />
the controls set for a "Servo Controlled" cycle, the two lock<br />
nuts 274339-4 are to be loosened, and the upper adjusting nut<br />
206522-3 is to be backed <strong>of</strong>f. Tighten the lower adjusting nut<br />
206522-3 until the three inch dimensio'ri. is obtained.<br />
Nowplace the starting handle in the "Start!1 position, which<br />
releases the brake, and check with a '.010 inch feeler gauge<br />
to see if there is clearance all around the band. This clearance<br />
can be maintained by adjusting the stop screws 274328-10<br />
which are located on the top <strong>of</strong> the brake cylinder, and also<br />
by the eccentric stop pins 274307-2. Remove the cotter pins<br />
274341-3, and loosen slightly the slotted nuts 274339-5. Use<br />
a wrench on the flats,provided on the ends <strong>of</strong> the stop pins,<br />
and turn the pins until clearance is obtained all around the<br />
brake band. After clearance has been obtained, hold the stop<br />
pins with a wrench, and secure the slotted nuts 274339-5. Replace<br />
the cotter pins.<br />
86. To adjust the foot valve control linkage. - With<br />
the' A-endheld in its center position by the centering plungers,


