OP-755 Part 2 Pages 197-401 - Personal Page of GENE SLOVER
OP-755 Part 2 Pages 197-401 - Personal Page of GENE SLOVER
OP-755 Part 2 Pages 197-401 - Personal Page of GENE SLOVER
Create successful ePaper yourself
Turn your PDF publications into a flip-book with our unique Google optimized e-Paper software.
339<br />
to be removed. Care must be taken not to injure<br />
the bronze bushing with the key when lever<br />
274335-9 is being dismantled. The bracket<br />
274333-1 is to be slipped <strong>of</strong>f the end <strong>of</strong> the<br />
shaft and reassembled in the opposite direction.<br />
The above parts are to be· reassembled<br />
for a. left hand installation; mount on the<br />
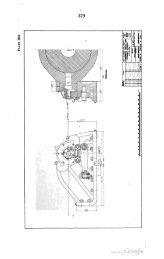
base as shownon assembly drawing 274249. The<br />
assembly is to be checked to insure that all<br />
parts are free from binding. The control<br />
linkage is then to be reassembled to the foot<br />
valve clevis 274335-2 and to the B-end control<br />
lever 274327-2. The linkage is to be adjusted<br />
as explained in the adjustment instructions.<br />
(r) The check valve 206639--,5located in the hydraulic<br />
motor head is to be changed for the L.R.<br />
installation as follows:- Remove the two 3/4<br />
inch pipe plugs 196826-11, which are located<br />
dire-ctly below the relief valve acorn nuts.<br />
Removethe spacer 274312-5, the spring 206639-1<br />
and the check valve 206639-5. Reassemble these<br />
parts in the opposite side and replace the 3/4<br />
inch pipe plugs. Next remove the 1/2 inch<br />
pipe plug from the end <strong>of</strong> the hydraulic motor<br />
head. One <strong>of</strong> the holes is plugged with a 3/8<br />
inch pipe plug. Removethe plUg and reassemble<br />
it in the other 3/8 inch tapped hole, and then<br />
rep~ace both <strong>of</strong> the 1/2 inch pipe plugs.<br />
179. A-end change over from right hand to Left hand. -<br />
(See assembly drawing <strong>of</strong> the A-end, dr. no. 274247.) The R.R.<br />
assembly is identical with the L.R. assembly except for the<br />
three external levers, mounted on the valve block assembly.<br />
Remove all three <strong>of</strong> the levers, by first removing the clamp<br />
bol ts, and replace them with the proper levers as shown on<br />
drawing 274272.<br />
274336-1 Lever L.H. Replaces 274272-1 Lever R.H.<br />
274336-3 Lever L'R' Replaces 274272-2 Lever R.R.<br />
274336-2 Lever L'R' Replaces 274272-2 Lever R.H.<br />
180. Control linkage change over from R. H. to L. H. -<br />
(See dr. no.·274251.) The coritrol linkage is identical for<br />
right and left hand installations, except for the control rods<br />
and lever which connect to the A-end. The lever 274251-1 on<br />
the R.H, assembly is to be removed, by first removing the clamp<br />
bol t 220718-2. It is to be replaced by L.H. lever 274254-1.<br />
The R.H. control rod 274251-2 is to be replaced by L.R. control<br />
rod 274254-2.


