DiMAGE Scan Elite II Hardware OM - Konica Minolta Photo Imaging ...
DiMAGE Scan Elite II Hardware OM - Konica Minolta Photo Imaging ...
DiMAGE Scan Elite II Hardware OM - Konica Minolta Photo Imaging ...

Create successful ePaper yourself
Turn your PDF publications into a flip-book with our unique Google optimized e-Paper software.
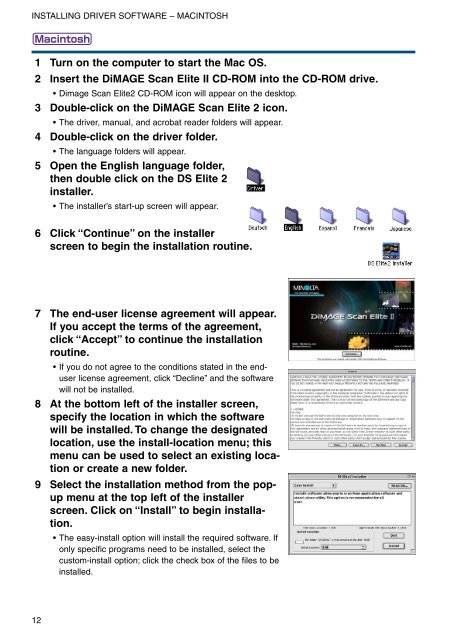
INSTALLING DRIVER SOFTWARE – MACINTOSH<br />
1 Turn on the computer to start the Mac OS.<br />
2 Insert the <strong>DiMAGE</strong> <strong>Scan</strong> <strong>Elite</strong> <strong>II</strong> CD-R<strong>OM</strong> into the CD-R<strong>OM</strong> drive.<br />
• Dimage <strong>Scan</strong> <strong>Elite</strong>2 CD-R<strong>OM</strong> icon will appear on the desktop.<br />
3 Double-click on the <strong>DiMAGE</strong> <strong>Scan</strong> <strong>Elite</strong> 2 icon.<br />
• The driver, manual, and acrobat reader folders will appear.<br />
4 Double-click on the driver folder.<br />
• The language folders will appear.<br />
5 Open the English language folder,<br />
then double click on the DS <strong>Elite</strong> 2<br />
installer.<br />
• The installer’s start-up screen will appear.<br />
6 Click “Continue” on the installer<br />
screen to begin the installation routine.<br />
7 The end-user license agreement will appear.<br />
If you accept the terms of the agreement,<br />
click “Accept” to continue the installation<br />
routine.<br />
• If you do not agree to the conditions stated in the enduser<br />
license agreement, click “Decline” and the software<br />
will not be installed.<br />
8 At the bottom left of the installer screen,<br />
specify the location in which the software<br />
will be installed. To change the designated<br />
location, use the install-location menu; this<br />
menu can be used to select an existing location<br />
or create a new folder.<br />
9 Select the installation method from the popup<br />
menu at the top left of the installer<br />
screen. Click on “Install” to begin installation.<br />
• The easy-install option will install the required software. If<br />
only specific programs need to be installed, select the<br />
custom-install option; click the check box of the files to be<br />
installed.<br />
12