JLR-10 Instruction Manual.pdf - Echomaster Marine Ltd.
JLR-10 Instruction Manual.pdf - Echomaster Marine Ltd.
JLR-10 Instruction Manual.pdf - Echomaster Marine Ltd.

You also want an ePaper? Increase the reach of your titles
YUMPU automatically turns print PDFs into web optimized ePapers that Google loves.
<strong>JLR</strong>-<strong>10</strong> GPS Compass<br />
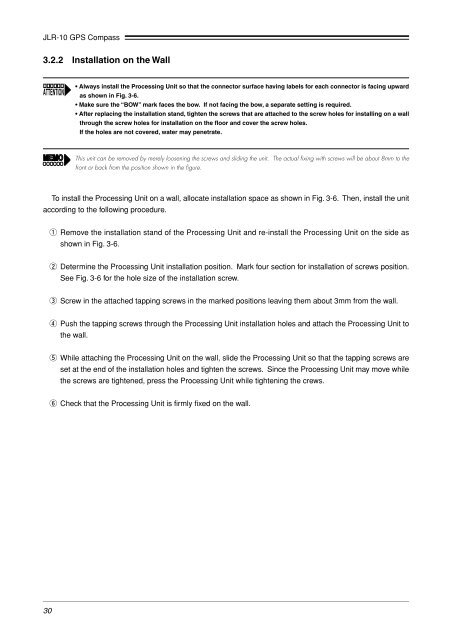
3.2.2 Installation on the Wall<br />
• Always install the Processing Unit so that the connector surface having labels for each connector is facing upward<br />
as shown in Fig. 3-6.<br />
• Make sure the “BOW” mark faces the bow. If not facing the bow, a separate setting is required.<br />
• After replacing the installation stand, tighten the screws that are attached to the screw holes for installing on a wall<br />
through the screw holes for installation on the floor and cover the screw holes.<br />
If the holes are not covered, water may penetrate.<br />
This unit can be removed by merely loosening the screws and sliding the unit. The actual fixing with screws will be about 8mm to the<br />
front or back from the position shown in the figure.<br />
To install the Processing Unit on a wall, allocate installation space as shown in Fig. 3-6. Then, install the unit<br />
according to the following procedure.<br />
q Remove the installation stand of the Processing Unit and re-install the Processing Unit on the side as<br />
shown in Fig. 3-6.<br />
w Determine the Processing Unit installation position. Mark four section for installation of screws position.<br />
See Fig. 3-6 for the hole size of the installation screw.<br />
e Screw in the attached tapping screws in the marked positions leaving them about 3mm from the wall.<br />
r Push the tapping screws through the Processing Unit installation holes and attach the Processing Unit to<br />
the wall.<br />
t While attaching the Processing Unit on the wall, slide the Processing Unit so that the tapping screws are<br />
set at the end of the installation holes and tighten the screws. Since the Processing Unit may move while<br />
the screws are tightened, press the Processing Unit while tightening the crews.<br />
y Check that the Processing Unit is firmly fixed on the wall.<br />
30